Assemblies
This page describes the APIs Onshape provides for working with assemblies.
Prerequisites
|
|---|
Endpoints
- createAssembly: Create a new assembly tab in a document.
curl -X 'POST' \ 'https://cad.onshape.com/api/v9/assemblies/d/{did}/w/{wid}' \ -H 'Accept: application/json;charset=UTF-8; qs=0.09' \ -H 'Authorization: Basic CREDENTIALS' \ -H 'Content-Type: application/json;charset=UTF-8; qs=0.09' \ -d '{ "name": "string" }' - getAssemblyDefinition: Get definition information for the assembly.
curl -X 'GET' \ 'https://cad.onshape.com/api/v9/assemblies/d/{did}/{wvm}/{wvmid}/e/{eid}?includeMateFeatures=false&includeNonSolids=false&includeMateConnectors=false&excludeSuppressed=false' \ -H 'Accept: application/json;charset=UTF-8; qs=0.09' \ -H 'Authorization: Basic CREDENTIALS' \ -H 'Content-Type: application/json;charset=UTF-8; qs=0.09' - modify: Modify an assembly
curl -X 'POST' \ 'https://cad.onshape.com/api/v9/assemblies/d/{did}/w/{wid}/e/{eid}/modify' \ -H 'Accept: application/json;charset=UTF-8; qs=0.09' \ -H 'Authorization: Basic CREDENTIALS' \ -H 'Content-Type: application/json;charset=UTF-8; qs=0.09' \ -d ' { "deleteInstances": [ "string" ], "editDescription": "string", "suppressInstances": [ "string" ], "transformDefinitions": [ { "isRelative": true, "occurrences": [ { "fullPathAsString": "string", "headInstanceId": "string", "occurrenceWithoutHead": "string", "occurrenceWithoutTail": "string", "parent": "string", "path": [ "string" ], "rootOccurrence": true, "tailInstanceId": "string" } ], "transform": [ 0 ] } ], "unsuppressInstances": [ "string" ] } - createInstance: Insert an instance of a part, sketch, assembly, or Part Studio into an assembly.
curl -X 'POST' \ 'https://cad.onshape.com/api/v9/assemblies/d/{targetDid}/w/{targetWid}/e/{targetEid}/instances' \ -H 'Accept: application/json;charset=UTF-8; qs=0.09' \ -H 'Authorization: Basic CREDENTIALS' \ -H 'Content-Type: application/json;charset=UTF-8; qs=0.09' \ -d '{ "configuration": "string", "documentId": "{sourceDid}", "elementId": "{sourceEid}", "featureId": "string", "includePartTypes": [ "PARTS" ], "isAssembly": true, "isHidden": true, "isSuppressed": true, "isWholePartStudio": true, "microversionId": "string", "partId": "string", "partNumber": "string", "revision": "string", "versionId": "{sourceEid}" }' - deleteFeature: Delete a feature from an assembly.
curl -X 'POST' \ 'https://cad.onshape.com/api/v9/assemblies/d/{did}/w/{wid}/e/{eid}/features/featureid/{fid}' \ -H 'Accept: application/json;charset=UTF-8; qs=0.09' \ -H 'Authorization: Basic CREDENTIALS' \ -H 'Content-Type: application/json;charset=UTF-8; qs=0.09' - deleteInstance: Delete an instance from an assembly.
curl -X 'POST' \
    'https://cad.onshape.com/api/v9/assemblies/d/{did}/w/{wid}/e/{eid}/instance/nodeid/{nid}' \
    -H 'Accept: application/json;charset=UTF-8; qs=0.09' \
    -H 'Authorization: Basic CREDENTIALS' \
    -H 'Content-Type: application/json;charset=UTF-8; qs=0.09'
Assembly transforms
See Sample Workflows: Transform an assembly for a working example.
Notes:
- Onshape assemblies use object-to-world affine transforms.
- Unlike in graphics or robotics, occurrence transforms are absolute and not relative to their parent’s transform.
- Transforms are defined with regard to the top-level assembly’s coordinate-system, which is determined by the source Part Studio where the instance was modeled.
- A part occurrence transform represents the location of the owning Part Studio’s coordinate system relative to the top-level assembly’s coordinate system.
- Transforms are defined the same way for rigid sub-assemblies.
- Each transform is encoded as a 4x4 matrix.
Matrices are encoded as:
| R00  R01  R02  Tx |
| R10  R11  R12  Ty |
| R20  R21  R22  Tz |
|  0    0    0    1 |
Where:
Rijencodes rotationTxyzencodes translation- The last row is always
0,0,0,1
When working with subassembly instances, transformations in each level are independent. When you call the getAssemblyDefinition endpoint, each part and subassembly is returned in the occurrences array. Each occurrence includes a transform matrix, which represents the absolute location of the occurrence in the top-level assembly’s coordinate system. The part occurrence’s coordinate system is the coordinate system of the Part Studio.
For example:
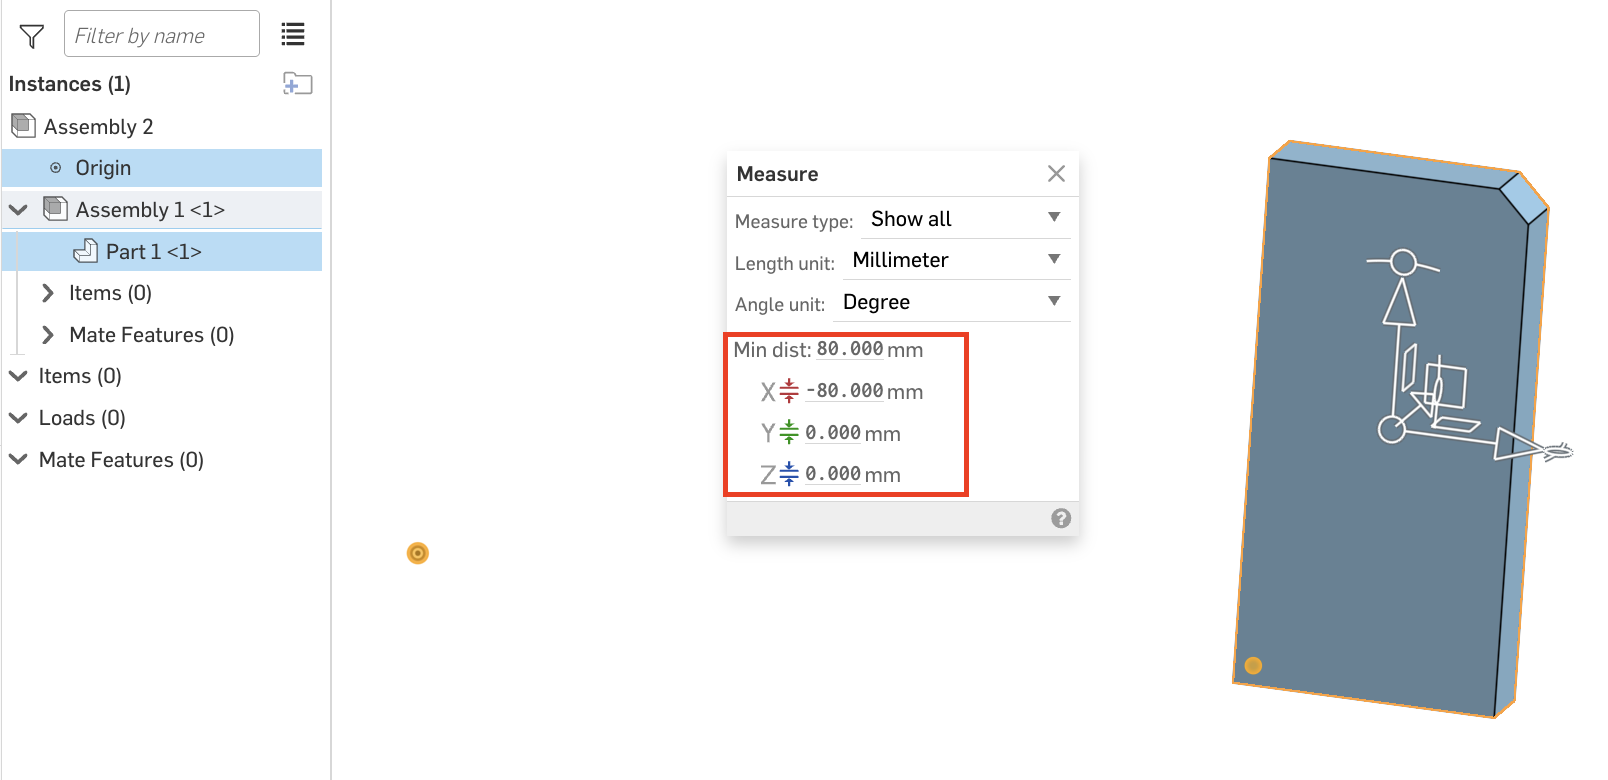
- Insert Part 1 into Assembly 1.
- In Assembly 1, move the part instance 30 mm along the X-axis.
- Call the getAssemblyDefinition endpoint on Assembly 1. The
transformmatrix displays the 30 mm (0.03 meter) transform.{ "occurrences": [ { "transform": [ 1,0,0,0.03, 0,1,0,0, 0,0,1,0, 0,0,0,1 ] }] } - Insert Assembly 1 into Assembly 2.
- In Assembly 2, move the part instance 50 mm along the X-axis.
- Call the getAssemblyDefinition endpoint on Assembly 2. The
transformmatrix indicates that the part has been moved a total of 80 mm (0.08 meter) from the source in the Part Studio.{ "occurrences": [ { "transform": [ 1,0,0,0, 0,1,0,0, 0,0,1,0, 0,0,0,1 ] }, { "transform": [ 1,0,0,0.08, 0,1,0,0, 0,0,1,0, 0,0,0,1 ] } ] }
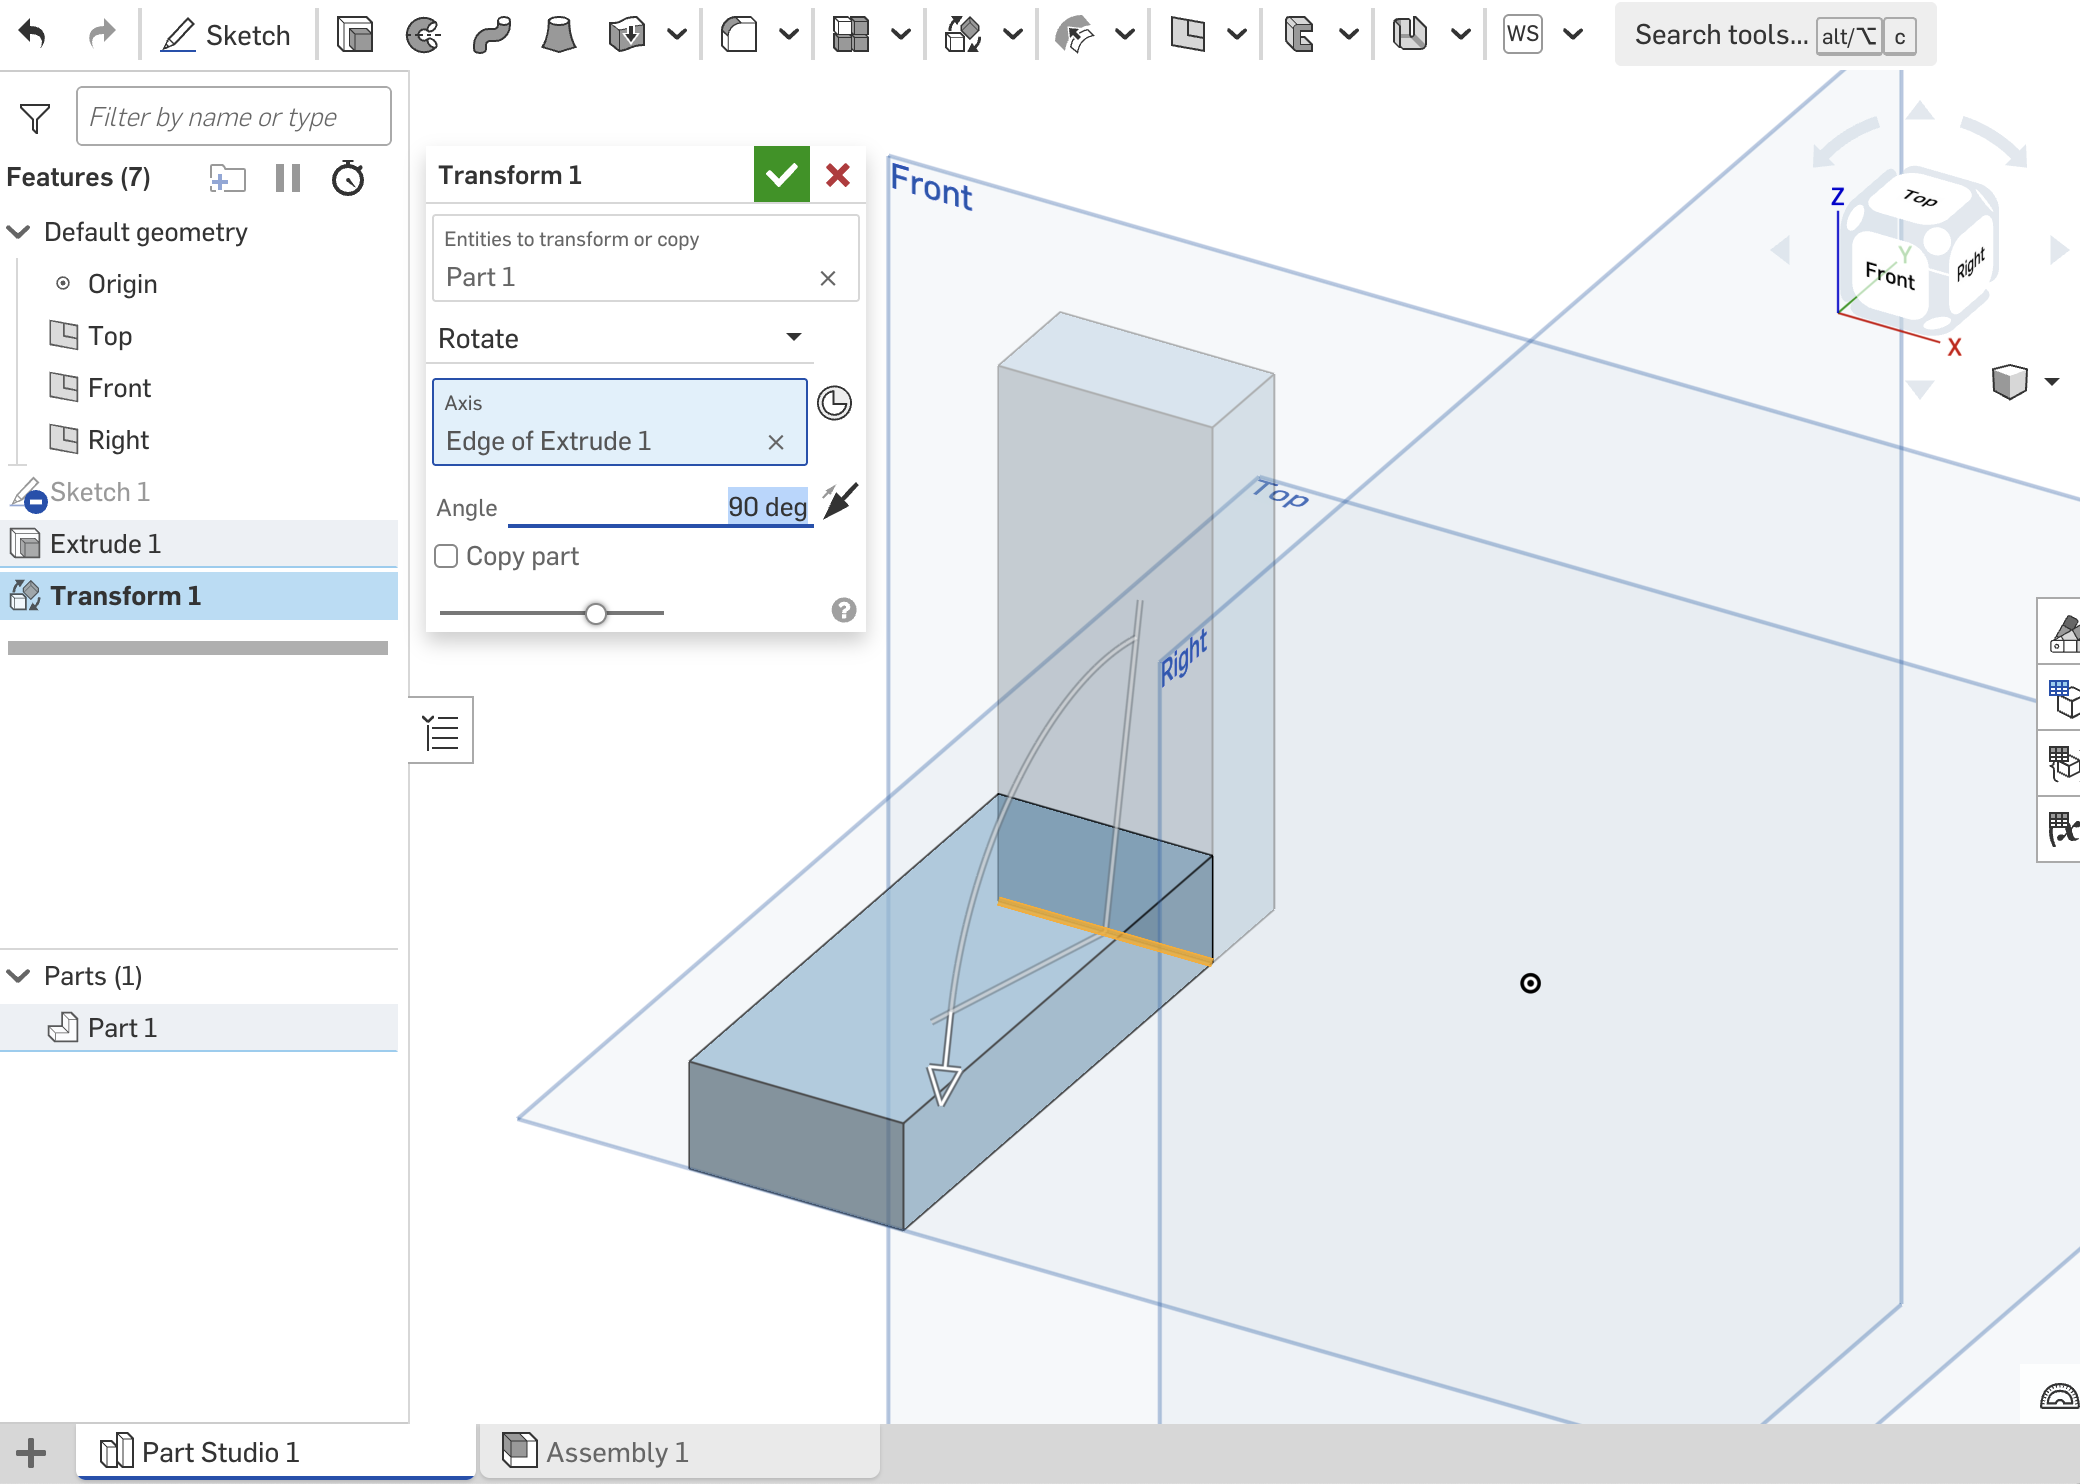
When instances are mated in an assembly, transformations done in the Part Studio can affect the transform result from the getAssemblyDefinition endpoint. For example, if you rotate a rectangular box in the Part Studio, the instances of the box in the assembly automatically rotate as well, but the getAssemblyDefinition remains unchanged, because the assembly has not been transformed away from the origin Part Studio.

{
  "occurrences": [
    {
    "transform": [
        1,0,0,0.04152549794188961,
        0,1,0,0.025139995726138297,
        0,0,1,-0.0021900598728476495,
        0,0,0,1
    ]},
    {
    "transform": [
        1,0,0,0,
        0,1,0,0,
        0,0,1,0,
        0,0,0,1
    ]}
  ]
}
To apply a transformation via the API, see Sample Workflows: Transform an assembly
Sample Workflows
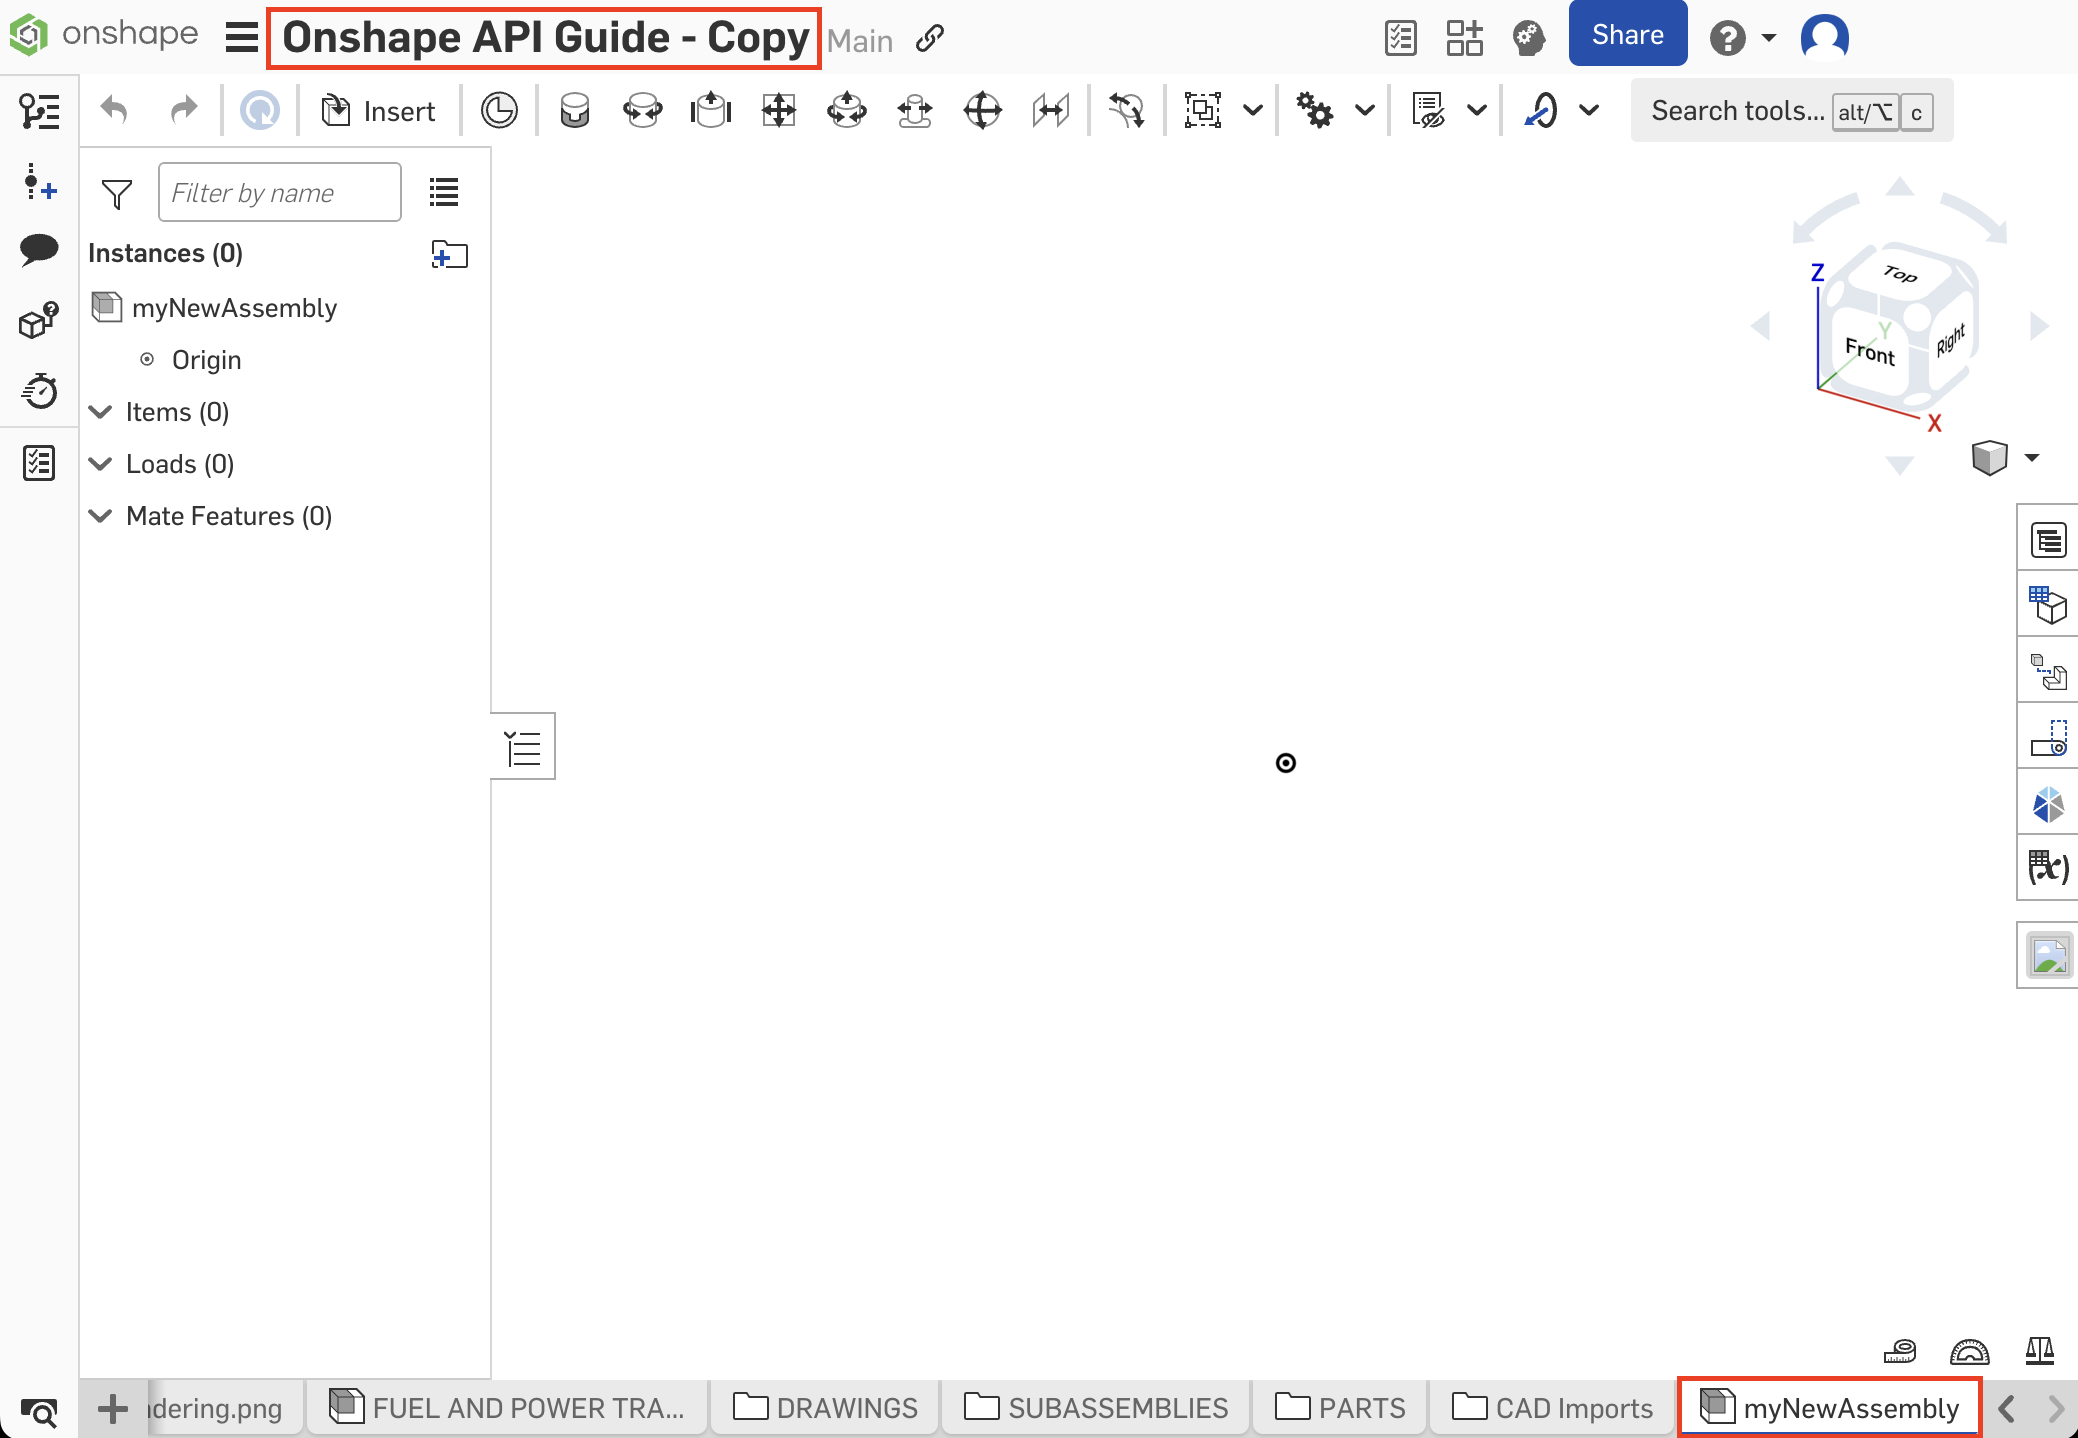
Create an assembly
- Make a copy of this public document, and make a note of the copied document and workspace IDs in the URL.
- Call the createAssembly endpoint. Specify a
namefor the new assembly tab in the request body; in this example, we’ll call itmyNewAssembly.curl -X 'POST' \ 'https://cad.onshape.com/api/v9/assemblies/d/{did}/w/{wid}' \ -H 'Accept: application/json;charset=UTF-8; qs=0.09' \ -H 'Authorization: Basic CREDENTIALS' \ -H 'Content-Type: application/json;charset=UTF-8; qs=0.09' \ -d '{ "name": "myNewAssembly" }' - Return to your document and observe that the new assembly tab has been added.
Insert a part into an assembly
- Follow all steps in the Create an assembly tutorial.
- In your copied document, open the
PARTStab folder, and then open theCRANKPart Studio. Make a note of the following IDs from theCRANKPart Studio:documentId- we’ll refer to this as oursourceDidfor this exampleworkspaceId- this is oursourceWidelementIdof theCRANKPart Studio - this is oursourceEid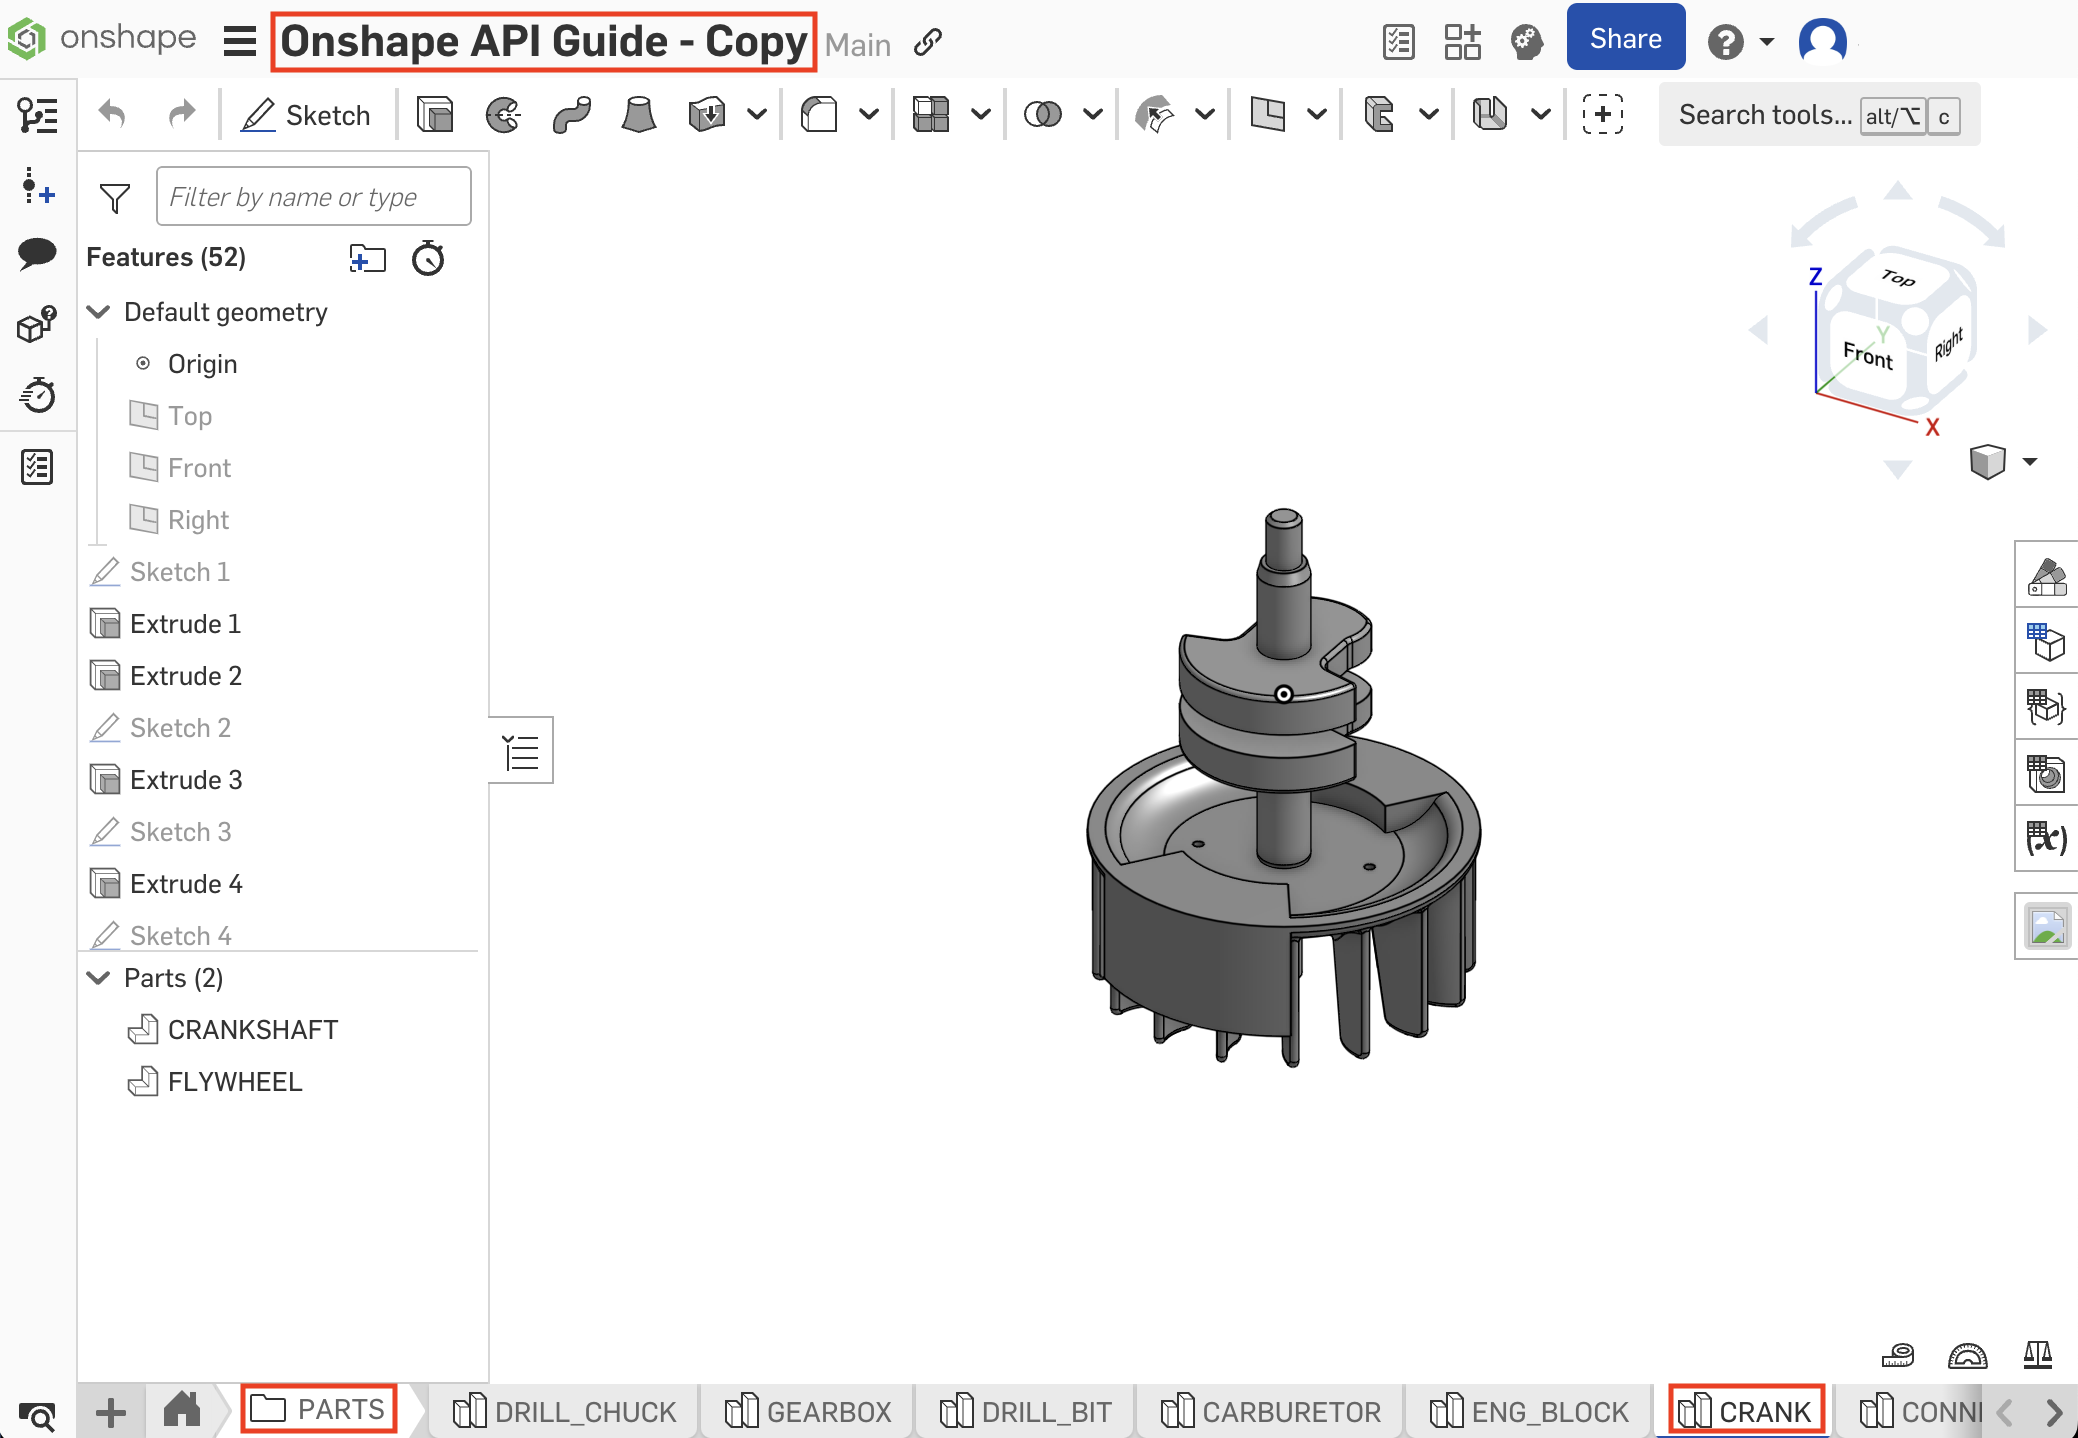
- Call the getPartsWMVE endpoint to get the part’s
partId:curl -X 'GET' \ 'https://cad.onshape.com/api/v9/parts/d/{sourceDid}/w/{sourceWid}/e/{sourceEid}?withThumbnails=false&includePropertyDefaults=false' \ -H 'Accept: application/json;charset=UTF-8; qs=0.09' \ -H 'Authorization: Basic CREDENTIALS'\ -H 'Content-Type: application/json;charset=UTF-8; qs=0.09' - Locate the
partIdfor"name": "CRANKSHAFT"in the response body:[{ "name": "CRANKSHAFT", "state": "IN_PROGRESS", "description": "Crankshaft", "revision": null, "partNumber": "PRT-10230", "elementId": "{sourceEid}", "partId": "JJH", "bodyType": "solid", "microversionId": "{sourceMid}", "customProperties": { "57f3fb8efa3416c06701d61e": "false" }, ... }] - Now open the
myNewAssemblytab you created in the last tutorial. We’ll insert our part into this assembly. Make a note of the following from the URL:documentId- we’ll refer to this as ourtargetDidworkspaceId- this is ourtargetWidelementIdof the assembly - this is ourtargetEid
- Call the createInstance endpoint on the assembly to insert an instance of the part into the assembly. Make sure to replace the IDs in the request URL match those from your copied target document.
curl -X 'POST' \ 'https://cad.onshape.com/api/v9/assemblies/d/{targetDid}/w/{targetWid}/e/{targetEid}/instances' \ -H 'Accept: application/json;charset=UTF-8; qs=0.09' \ -H 'Authorization: Basic CREDENTIALS'\ -H 'Content-Type: application/json;charset=UTF-8; qs=0.09' \ -d '{ "documentId": "{sourceDid}", "elementId": "{sourceEid}", "includePartTypes": [ "PARTS" ], "partId": "{partId}" }'- Note: you can add
"versionId": "{sourceVid}"to the request body if needed.
- Note: you can add
- Refresh your assembly and confirm the part has been added.
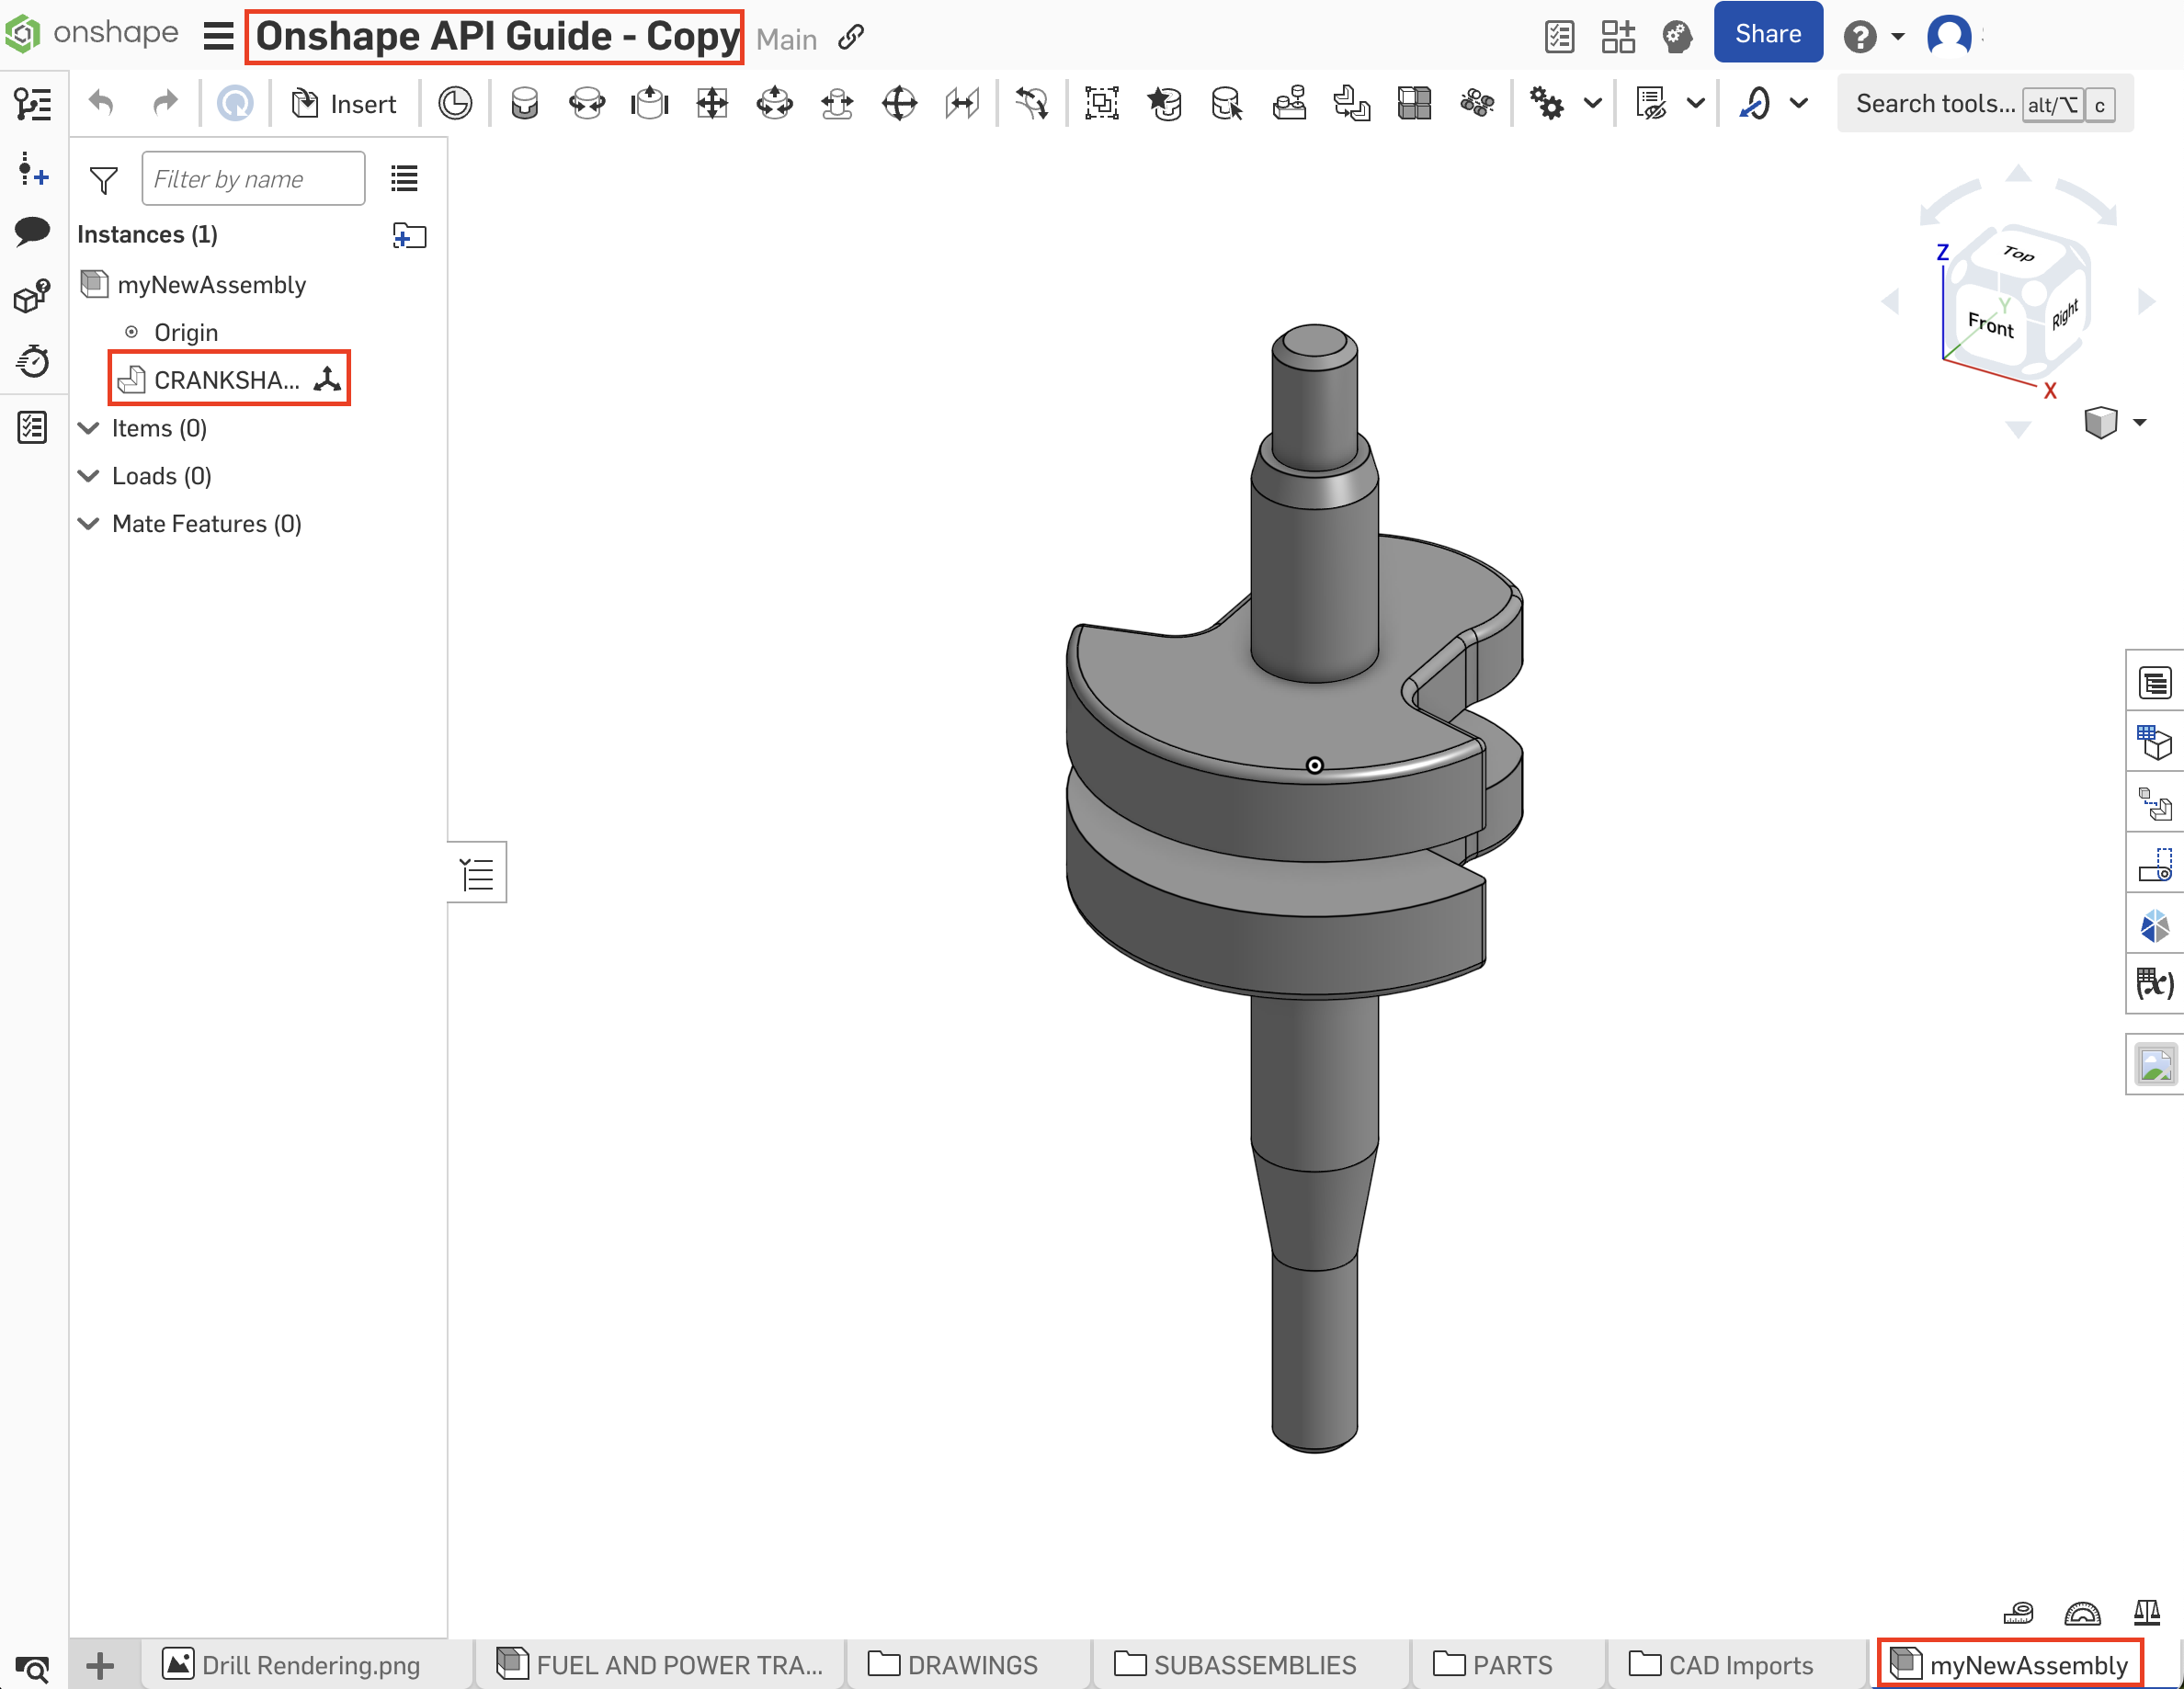
- Repeat steps 4-7 to add the
FLYWHEELpart from theCRANKPart Studio to themyNewAssemblyassembly.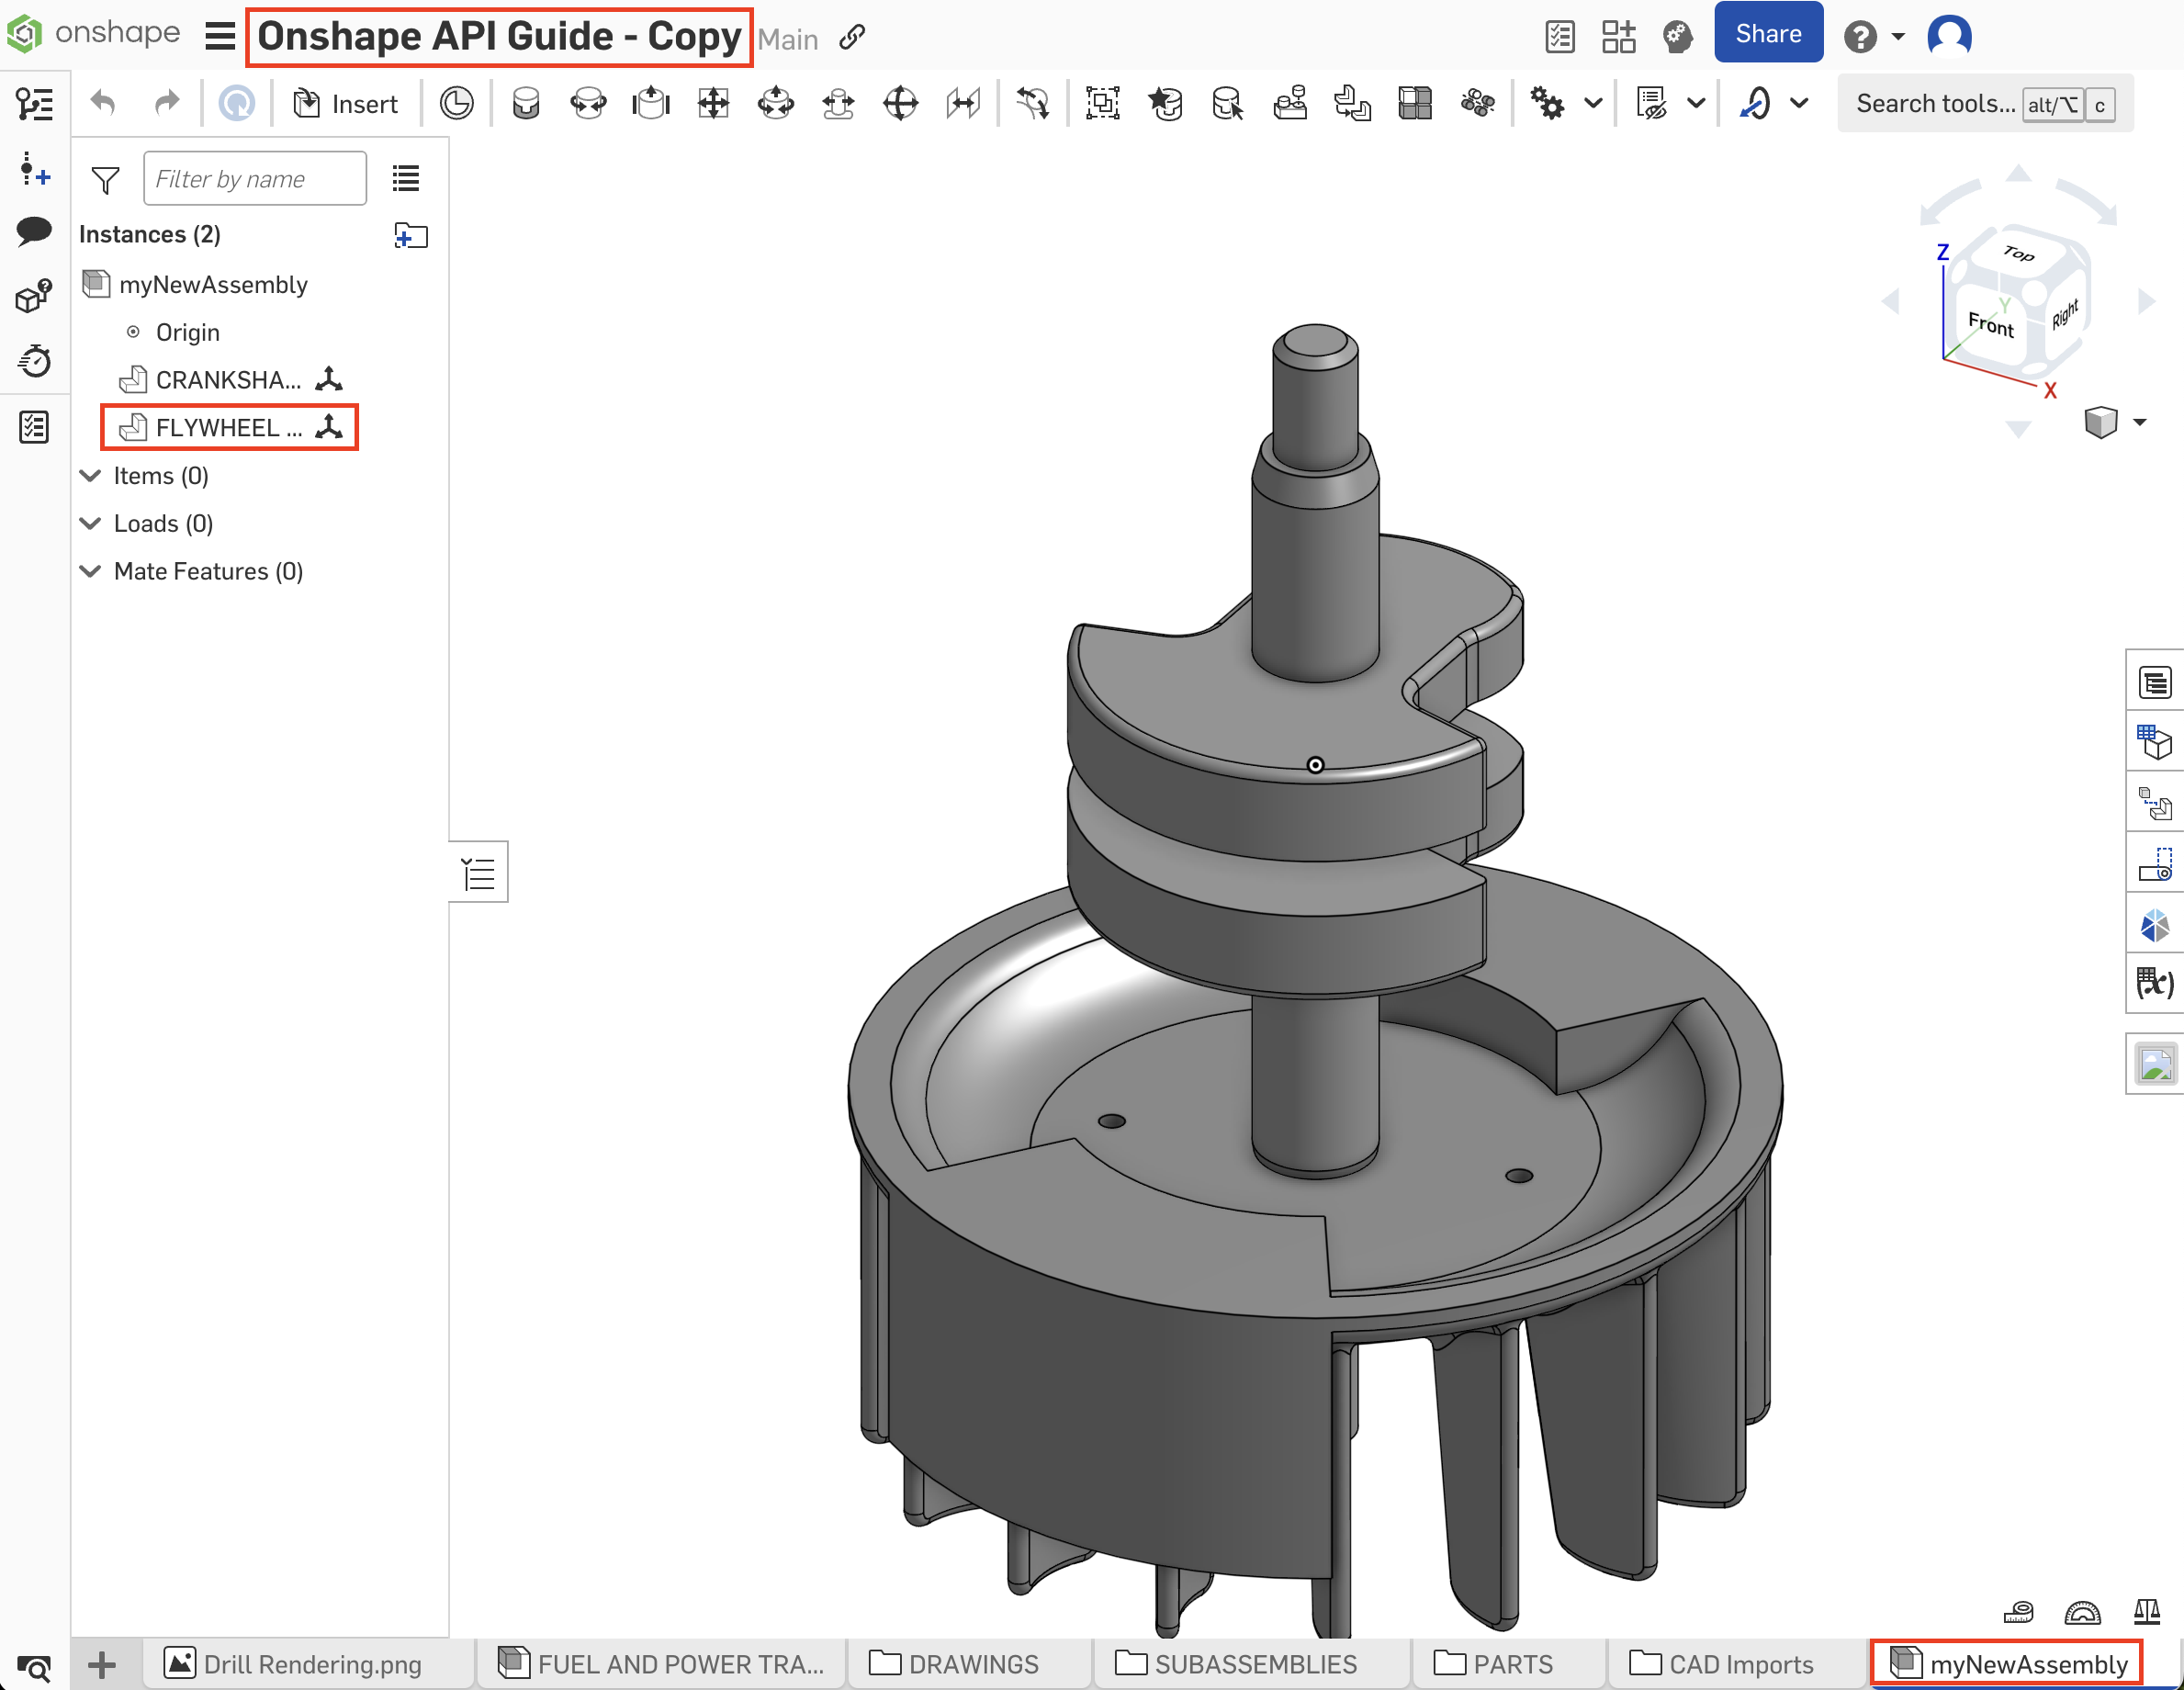
Get assembly definition
- Follow all steps in the Insert a part into an assembly tutorial.
- Open the
myNewAssemblytab in your copied document make a note of the document, workspace, and element (tab) IDs in the URL. - Call the getAssemblyDefinition/ endpoint:
curl -X 'GET' \ 'https://cad.onshape.com/api/v9/assemblies/d/{did}/{wvm}/{wvmid}/e/{eid}' \ -H 'Accept: application/json;charset=UTF-8; qs=0.09' \ -H 'Authorization: Basic CREDENTIALS' \ -H 'Content-Type: application/json;charset=UTF-8; qs=0.09' - The assembly definition information is returned in JSON format in the response body.
- Make a note of the
rootAssembly.instances.idfor"name": "CRANKSHAFT <1>"; we’ll use thisinstanceIdto modify the assembly in the Modify an assembly tutorial. - Make a note of the
rootAssembly.instances.idfor"name": "FLYWHEEL <1>"; we’ll use this as ournodeIdin the Delete an assembly instance tutorial.
"instances": [{ "isStandardContent": false, "type": "Part", "name": "CRANKSHAFT <1>", "suppressed": false, "id": "{instanceId}", "partId": "{partId}", "fullConfiguration": "default", "configuration": "default", "documentId": "{did}", "elementId": "{eid}", "documentMicroversion": "{mid}" }, ... ] - Make a note of the
Modify an assembly
- Follow all steps in the Get assembly definition tutorial.
- Call the modify endpoint on your
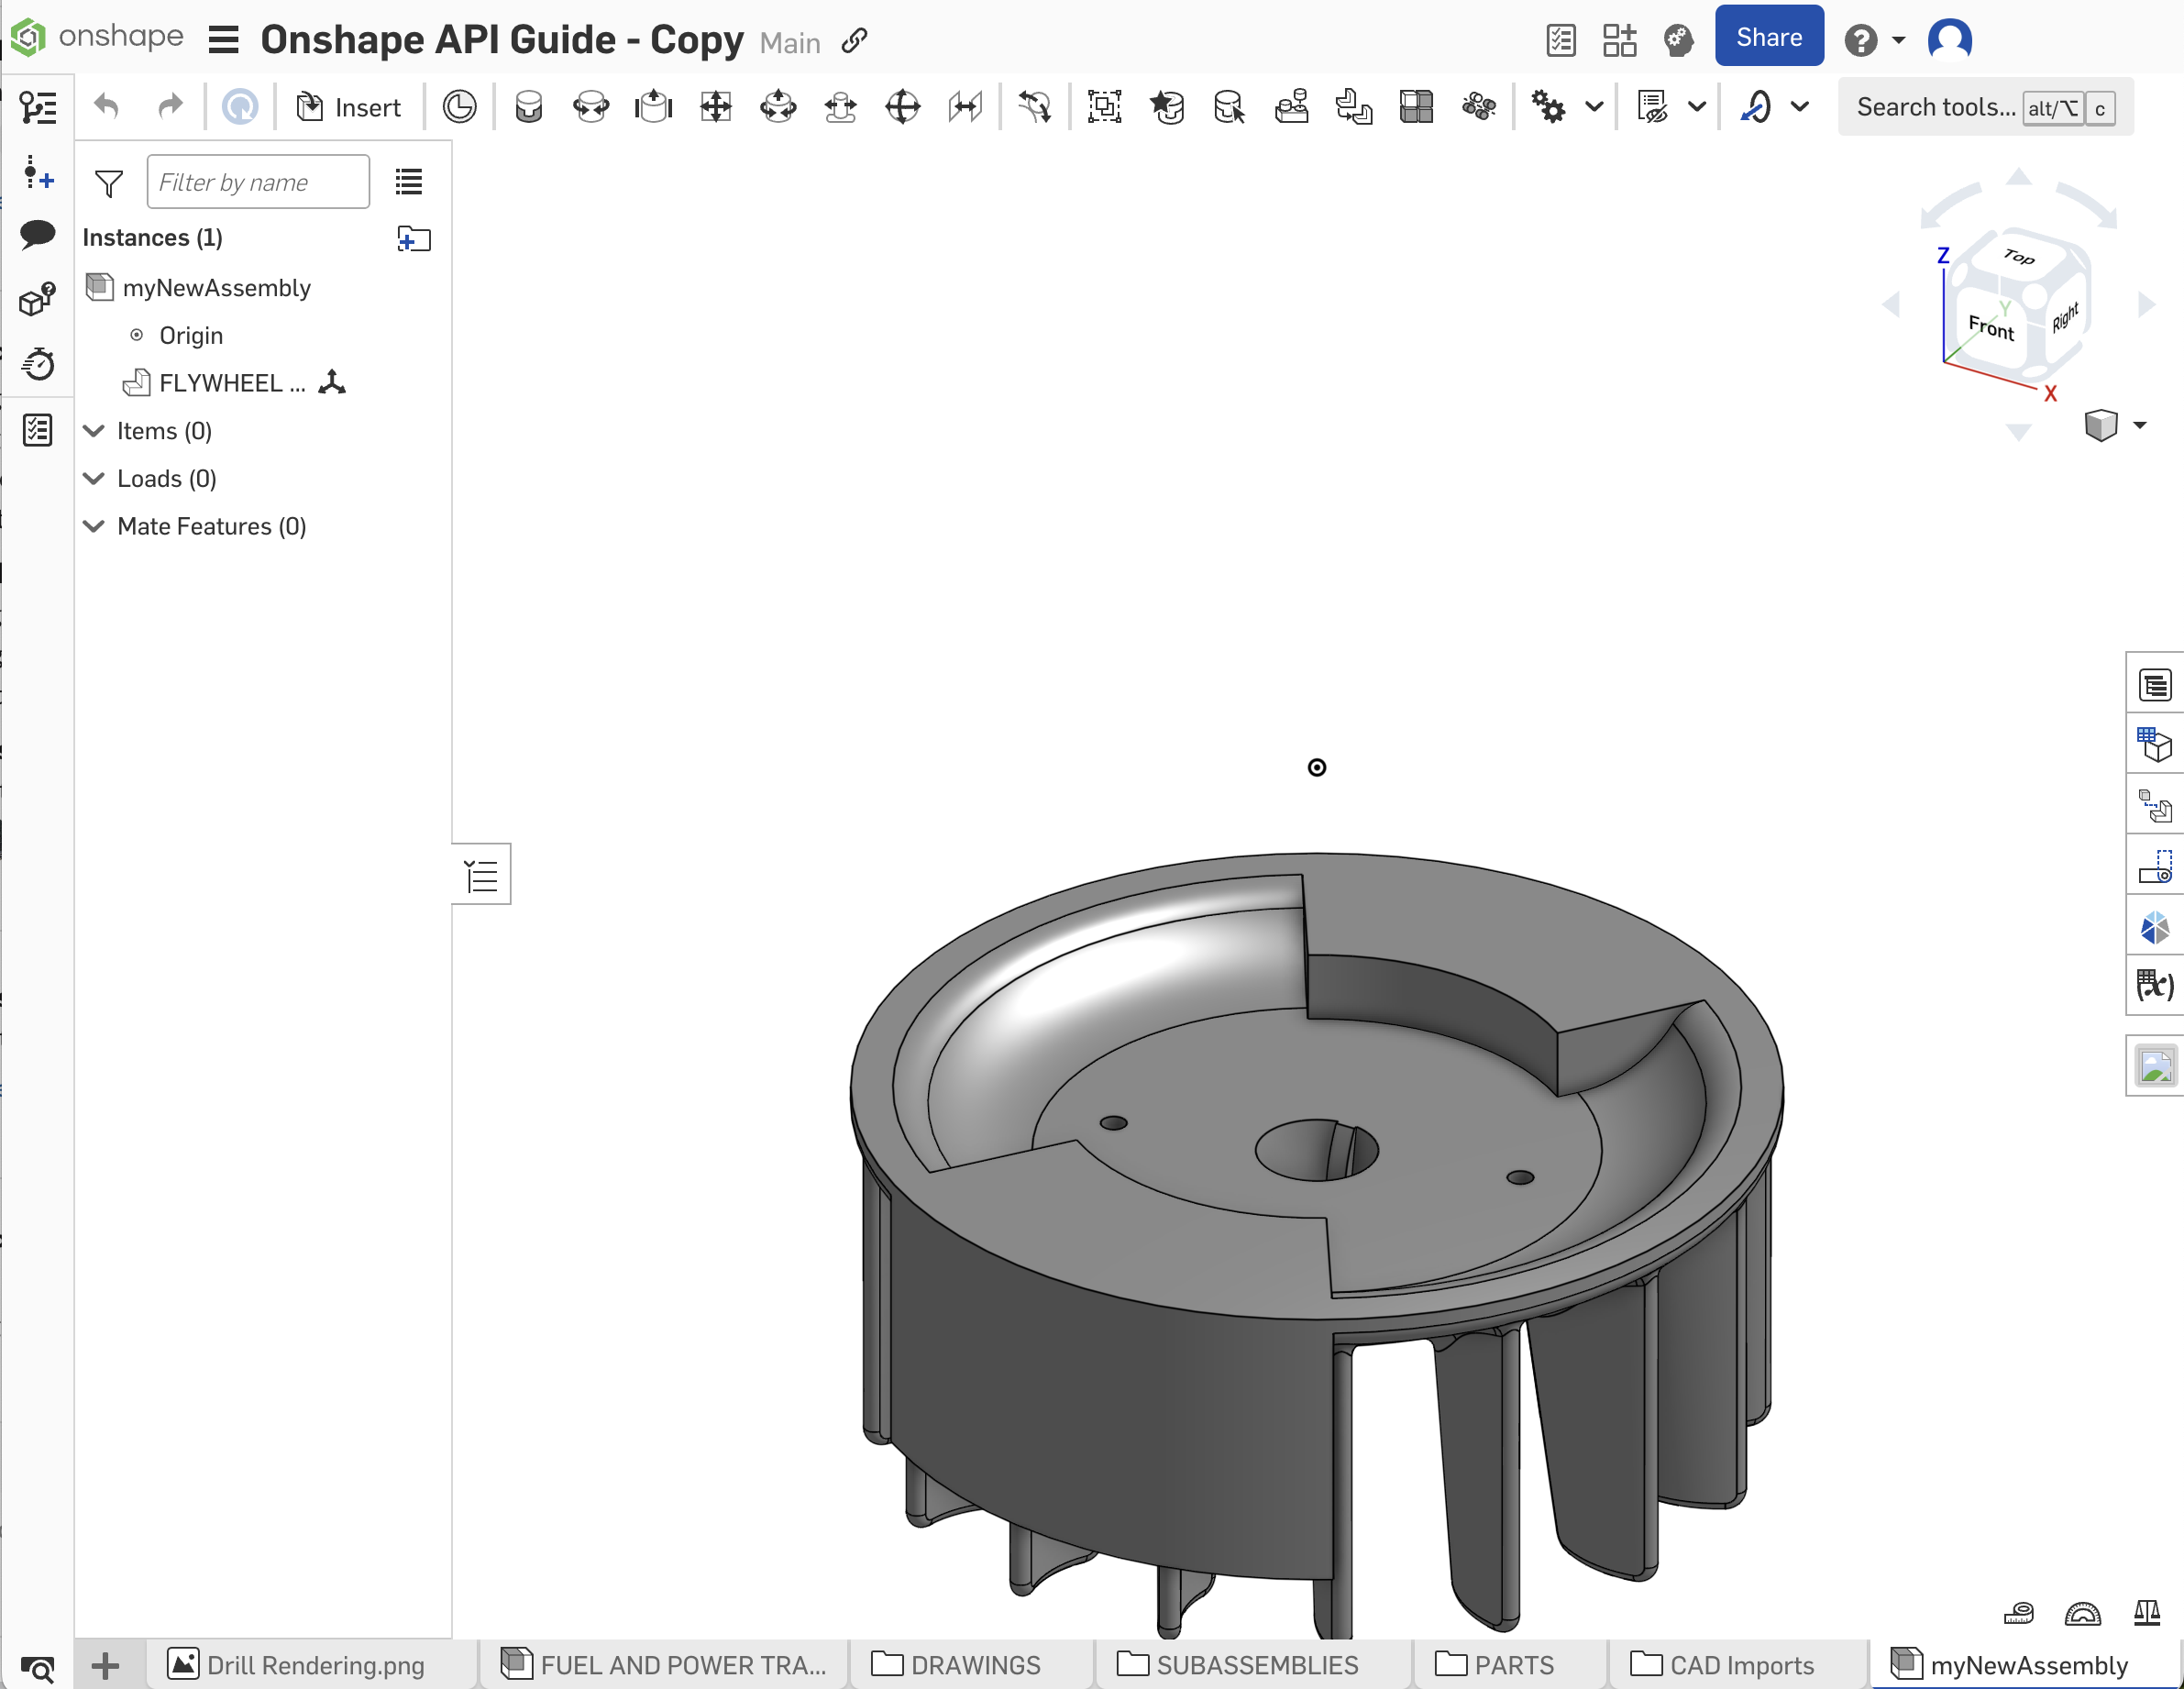
myNewAssemblytab. Send the desired modification information in the request body. In this example, we’ll use the modify endpoint to delete theCRANKSHAFTinstance from the assembly.curl -X 'POST' \ 'https://cad.onshape.com/api/v9/assemblies/d/{did}/w/{wid}/e/{eid}/modify' \ -H 'Accept: application/json;charset=UTF-8; qs=0.09' \ -H 'Authorization: Basic CREDENTIALS' \ -H 'Content-Type: application/json;charset=UTF-8; qs=0.09' \ -d ' { "deleteInstances": [{instanceId}] } - Refresh your document and observe that the instance has been deleted from the assembly.
Delete an assembly instance
You can also use the deleteInstance endpoint to remove instances from an assembly.
- Follow all steps in the Modify an assembly tutorial.
- Call the deleteInstance endpoint to delete the
FLYWHEELinstance from the assembly. Use theinstanceIdfrom the Get assembly definition tutorial from the last step as thenodeId({nid}) in the URL.curl -X 'POST' \ 'https://cad.onshape.com/api/v9/assemblies/d/{did}/w/{wid}/e/{eid}/instance/nodeid/{nid}' \ -H 'Accept: application/json;charset=UTF-8; qs=0.09' \ -H 'Authorization: Basic CREDENTIALS' \ -H 'Content-Type: application/json;charset=UTF-8; qs=0.09' - Return to your Onshape document and confirm the instance has been removed from the assembly.
Create a mate connector in an assembly
Given an assembly that includes at least one part, use the following code to create a mate connector on the part.
Notes:
- The
btTypefor creating a mate isBTMMateConnector-66. - Call getAssemblyDefinition to obtain the
instanceIdandpartIdof the part(s) on which to place the mate connector.- When referencing a part in a subassembly, form a chain of
instanceIdsstarting from the top-level instance down to the instance that should own the mate connector. CallgetAssemblyDefinitionon each subassembly to get the nextinstanceId.
- When referencing a part in a subassembly, form a chain of
- Use the
partIdto call getBodyDetails to get theidof the part face(s), edge(s), or vertex(es) on which to place the mate connector; use this as thedeterministicId. - To join mate connectors, create a mate.
- This example shows creating 3 mate connectors.
Endpoint
POST /api/v12/assemblies/d/{did}/{wvm}/{wvmid}/e/{eid}/features
Request Body
{
  "feature": {
      "btType": "BTMMateConnector-66",
      "featureType": "mateConnector",
      "name": "Mate connector 1",
      "parameters": [
        {
          "btType": "BTMParameterEnum-145",
          "enumName": "Origin type",
          "value": "ON_ENTITY",
          "parameterId": "originType"
        },
        {
          "btType": "BTMParameterQueryWithOccurrenceList-67",
          "queries": [
            {
              "btType": "BTMInferenceQueryWithOccurrence-1083",
              "inferenceType": "CENTROID",
              "path": [
                <instanceIdOne>,
                <instanceIdTwo>,
                <instanceIdThree>
              ],
              "deterministicIds": [
                <deterministicIdOne>,
                <deterministicIdTwo>,
                <deterministicIdThree>
              ]
            }
          ],
          "parameterId": "originQuery",
          "parameterName": "",
          "libraryRelationType": "NONE"
        }
      ],
      "isHidden": false,
      "suppressed": false
    }
}
Create a mate in an assembly
Given an assembly that includes two mate connectors, use the following code to create a Fastened mate between them.
- Use the
featureIdreturned when creating the mate connector, or call Assembly/getFeatures to obtain thefeatureIdof the mate connectors to join. - The
btTypefor creating a mate isBTMMate-64and supports the following types (sent in theparameters.valuefield):FASTENED SLIDER CYLINDRICAL REVOLUTE PIN_SLOT PLANAR BALL PARALLEL
Endpoint
POST /api/v12/assemblies/d/{did}/{wvm}/{wvmid}/e/{eid}/features
Request Body
{
  "feature": {
      "btType": "BTMMate-64",
      "featureType": "mate",
      "returnAfterSubfeatures": false,
      "subFeatures": [],
      "namespace": "",
      "version": 2,
      "name": "Fastened 1",
      "parameters": [
        {
          "btType": "BTMParameterEnum-145",
          "namespace": "",
          "enumName": "Mate type",
          "value": "FASTENED",
          "parameterId": "mateType"
        },
        {
          "btType": "BTMParameterQueryWithOccurrenceList-67",
          "queries": [
            {
              "btType": "BTMFeatureQueryWithOccurrence-157",
              "path": [],
              "featureId": <featureIdOne>,
              "queryData": ""
            },
            {
              "btType": "BTMFeatureQueryWithOccurrence-157",
              "path": [],
              "featureId": <featureIdTwo>,
              "queryData": ""
            }
          ],
          "parameterId": "mateConnectorsQuery"
        }
      ],
      "suppressed": false
    }
}
Transform an assembly
To create a transformation via the API, add the encoded transform matrix to the transformDefinitions array in the modify request body.
- See Assembly transforms for details on encoding the
transformmatrix. - Call the Get assembly definition endpoint to obtain the
pathto the assembly or subassembly.- The
pathis an array of strings that map the top-level assembly path down to the occurrence you want to transform. - Each
pathstring usually takes a form similar toM4QG1rVZfozeARX+H.
- The
This example translates a second-level subassembly (indicated by the two IDs provided in the path) by 1.3 m along the X-axis:
Endpoint
POST assemblies/did/{did}/w/{wid}/e/{eid}/modify
Request Body
{
  "transformDefinitions": [
    {
      "occurrences": [
        {
          "path": [
            <topLevelPath>,
            <secondLevelPath>
          ]
        }
      ],
      "transform": [
        1,0,0,1.3,
        0,1,0,0,
        0,0,1,0,
        0,0,0,1
      ]
    }
  ]
}