Quick Start
In this example, we will call an Onshape REST API endpoint to send a document name to our console. We highly recommend completing the Learning Center’s Intro to the Onshape API course and mastering using Onshape APIs within the Glassworks Explorer before moving on to creating scripts and apps. Please note that the sample shown on this page is only designed to be used as a quick start guide and does not represent a full Onshape application.
Code Snippets
import requests
import json

# Assemble the URL for the API call
api_url = "https://cad.onshape.com/api/v10/documents/e60c4803eaf2ac8be492c18e"

# Optional query parameters can be assigned
params = {}

# Use the keys from the developer portal
access_key = "ACCESS_KEY"
secret_key = "SECRET_KEY"

# Define the header for the request
headers = {'Accept': 'application/json;charset=UTF-8;qs=0.09',
           'Content-Type': 'application/json'}

# Putting everything together to make the API request
response = requests.get(api_url,
                        params=params,
                        auth=(access_key, secret_key),
                        headers=headers)

# Convert the response to formatted JSON and print the `name` property
print(json.dumps(response.json()["name"], indent=4))
curl -X 'GET' \
https://cad.onshape.com/api/v10/documents/e60c4803eaf2ac8be492c18e \
  -H 'Content-Type: application/json' \
  -H 'Accept: application/json;charset=UTF-8; qs=0.09' \
  -H 'Authorization: Basic CREDENTIALS'
import fetch from 'node-fetch';

async function getDocument(url='') {
    const response = await fetch(url, {
      method: 'GET',
      headers: {
        'Content-Type': 'application/json',
        Accept: 'application/json;charset=UTF-8;qs=0.09',
        Authorization: `Basic ${btoa('CREDENTIALS')}`
      }
    });
    return response.json();
}

getDocument('https://cad.onshape.com/api/v10/documents/e60c4803eaf2ac8be492c18e'
).then((data) => {
    console.log(data.name);
});
#include <iostream>
#include <string>
#include <stdio.h>
using namespace std;

int main() {
    string url = "curl ";

    url += "-X 'GET' ";
    url += "'https://cad.onshape.com/api/v10/documents/e60c4803eaf2ac8be492c18e'";
    url += "-H 'accept: application/json;charset=UTF-8; qs=0.09' ";
    url += "-H 'Authorization: Basic CREDENTIALS'";

    system(url.c_str());
    return 0;
}
Quick Start Video
Watch the Onshape Quick Start video as you follow along with the steps on this page.
Quick Start Steps
System Requirements
- You must be signed in to your Onshape account at https://cad.onshape.com (or https://companyName.onshape.com for Enterprise accounts).
- This example is coded in Python. The equivalent code is provided in other languages at the end of the example. To follow along with this tutorial, you can download and install Python here: https://www.python.org/downloads/.
1. Review the API Endpoint
- Go to the API Explorer and scroll to
Document. - Expand the
GET /documents/{did}endpoint. Note that in the URL, the name of this API isgetDocument. - Make a note of the URL structure and the parameters required to make this request. This will become the fixed URL part of our API call.
 For this endpoint, we only need to get the document ID from the document URL.
 - Scroll down and make a note of the
Media Typethat we’ll need to include in our header.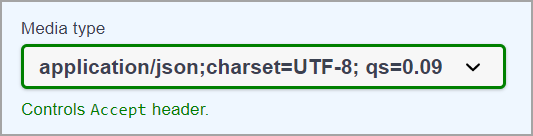
2. Review the Document
Navigate to this public document, and make a note of the document ID in the URL (e60c4803eaf2ac8be492c18e).
3. Create your API Keys
- Go to https://cad.onshape.com/appstore/dev-portal.
- In the left pane, click
API keys. - Click the
Create new API keybutton. - Select the following permissions for your app:
Application can read your documents.Application can write to your documents.
- Click the
Create API keybutton.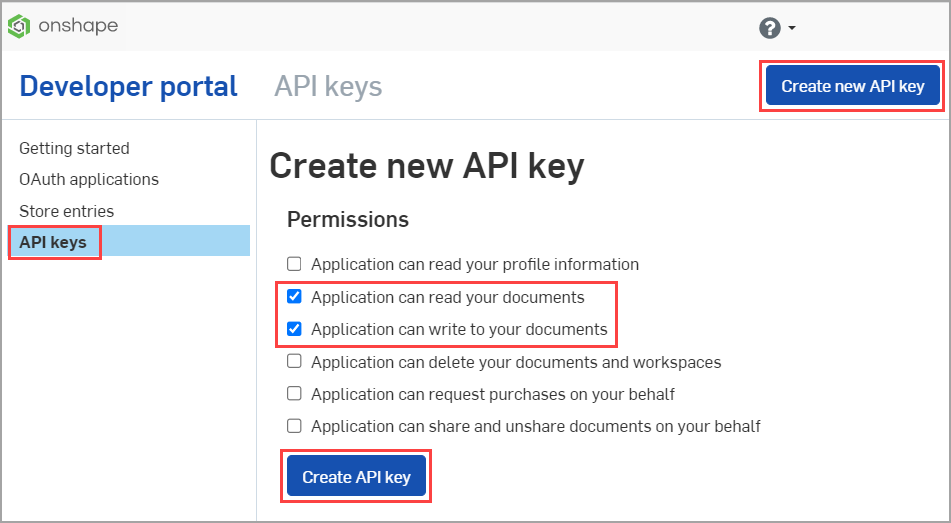
- Copy both the access key and secret key from the pop-up window, save them somewhere, then click the
Closebutton.IMPORTANT NOTE: You will not be able to find the secret key again, so save it somewhere safe!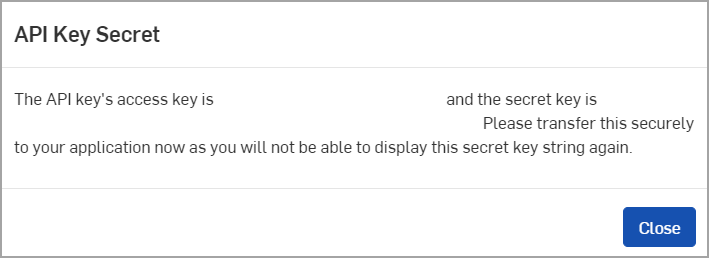
- The details for your application appear. We’ll refer to these strings as
ACCESS_KEYandSECRET_KEYin this example.
- Some scripts might require that you base-64-encode your API keys. You’ll see either
ACCESS_KEYandSECRET_KEYin the code examples below, or you’ll seeCREDENTIALSto specify that the keys must be encoded before use. See API Guide: API Keys for details.
4. Write Your Code
Follow along with the steps in this section to create the final code. This example uses python, but you can refer to the code snippets at the top of this page for other languages.
- Create a new file called
getDocInfo.py. - Start your file by importing the necessary libraries.
import requests import json - Next, define the URL for the API call:
# Assemble the URL for the API call api_url = "ASSEMBLED_URL" - Replace
ASSEMBLED_URLwith the fully formed API. This is where we’ll put together everything we’ve learned so far:- The base URL:
https://cad.onshape.com/apihttps://companyName.onshape.com/apifor Enterprise accounts
- The fixed URL is specified in the
getDocumentAPI in Glassworks:/documents/{did} - The document ID parameter from the public document URL to include in the fixed URL:
{did}: e60c4803eaf2ac8be492c18e - Together, this makes the URL for our API request:
https://cad.onshape.com/api/v10/documents/e60c4803eaf2ac8be492c18e
- The base URL:
- We don’t need to send any optional parameters with our request, so we can define them as an empty object:
# Optional query parameters can be assigned params = {} - Now let’s add variables to represent our access and secret keys. Make sure to replace
ACCESS_KEYandSECRET_KEYwith your strings from the dev portal.# Use the keys from the developer portal access_key = "ACCESS_KEY" secret_key = "SECRET_KEY" - Next, define your headers:
# Define the header for the request headers = { 'Accept': 'MEDIA_TYPE', 'Content-Type': 'application/json' } - Replace
MEDIA_TYPEwith the Media type we obtained from the API Explorer during the Review the API section above:'Accept': 'application/json;charset=UTF-8;qs=0.09', - Put all the variables you just defined together into the request. The requests library implements Basic Authorization using the supplied API keys.
# Put everything together to make the API request response = requests.get(api_url, params=params, auth=(access_key, secret_key), headers=headers) - And finally, print the name value from the response:
# Convert the response to formatted JSON and print the `name` property print(json.dumps(response.json()["name"], indent=4)) - Make sure your file matches the full example shown at the beginning of this section.
5. Run Your Code
- Open your terminal/command prompt and navigate into the folder where you saved your
getDocInfo.pyfile:cd ~/<your-path>cd \<your-path> - Install the necessary modules. If you have
pipinstalled on your machine, you can runpip install requestsinstead.python3 -m pip install requestspy -m pip install requests - Run your code:
python3 getDocInfo.pypy getDocInfo.py - Confirm that your console displays:
"Onshape API Guide"