App Development
The primary APIs provided by Onshape are REST interfaces that can be accessed over HTTPS. The client can be a web server or a desktop application (including command line tools, such as curl). Onshape does not support use of the APIs directly from a browser client due to cross-domain scripting concerns.
Partner applications typically interact with Onshape in three ways:
- File Exchange: Onshape provides extensive import and export translation capabilities to interact with applications that can read or write a variety of file formats.
- Live Link Integration: Desktop or server applications can use REST calls to read information from the Onshape servers and store information back. These applications can gain “cloud value” by using Onshape data management capabilities for sharing, versioning, and durability.
- In-Tab Integration: Web server applications can create a tightly integrated experience within Onshape by using a combination of REST and client-side APIs to build a seamless interaction by interacting with users inside an Onshape tab.
The following diagram illustrates basic desktop integration and cloud integration architecture:
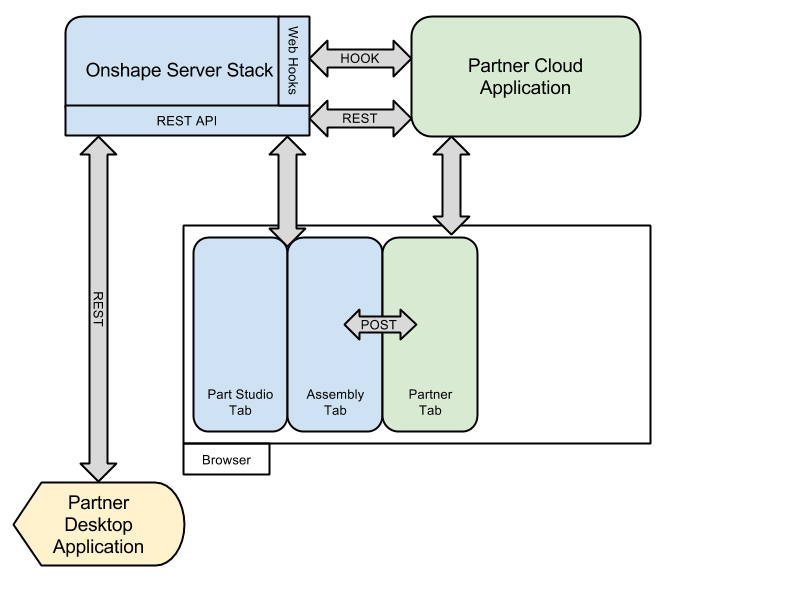
The Onshape Server Stack consists of several cooperating servers that provide the underlying support for the Onshape CAD experience. The Onshape servers are built with a variety of technologies, including Java and C++, database and message services, geometry and constraint management systems, and much more.
Partner cloud applications can be written in any web framework. Onshape provides a set of sample apps in Github.
App development workflow
To create an app that opens in the Onshape UI for internal use or testing:
- Register the app with Onshape.
- Create an extension for the app in the Onshape UI.
- Create an app store entry.
- Subscribe to the app.
- Company, Classroom, and Enterprise admins can assign internal users, aliases, and teams to apps in their Developer Settings without having to create a store entry.
See Hello World for an example.
To publish the app to the Onshape App Store for end users:
- Authenticate with OAuth2.
- Complete the Launch Checklist.
Create an application
- Do one of the following:
- Company/Classroom/Enterprise admins should go to their Developer Settings.
- Users with individual accounts should go to their Developer Portal.
⚠️ WARNING- All applications created in the Onshape Settings are owned by the company and count towards the company's API Limits.
- All applications created in the Developer Portal are owned by the user and count towards the user's API Limits.
- Click OAuth applications in the sidebar.
- Click the Create new OAuth application button.

- Fill out the form:
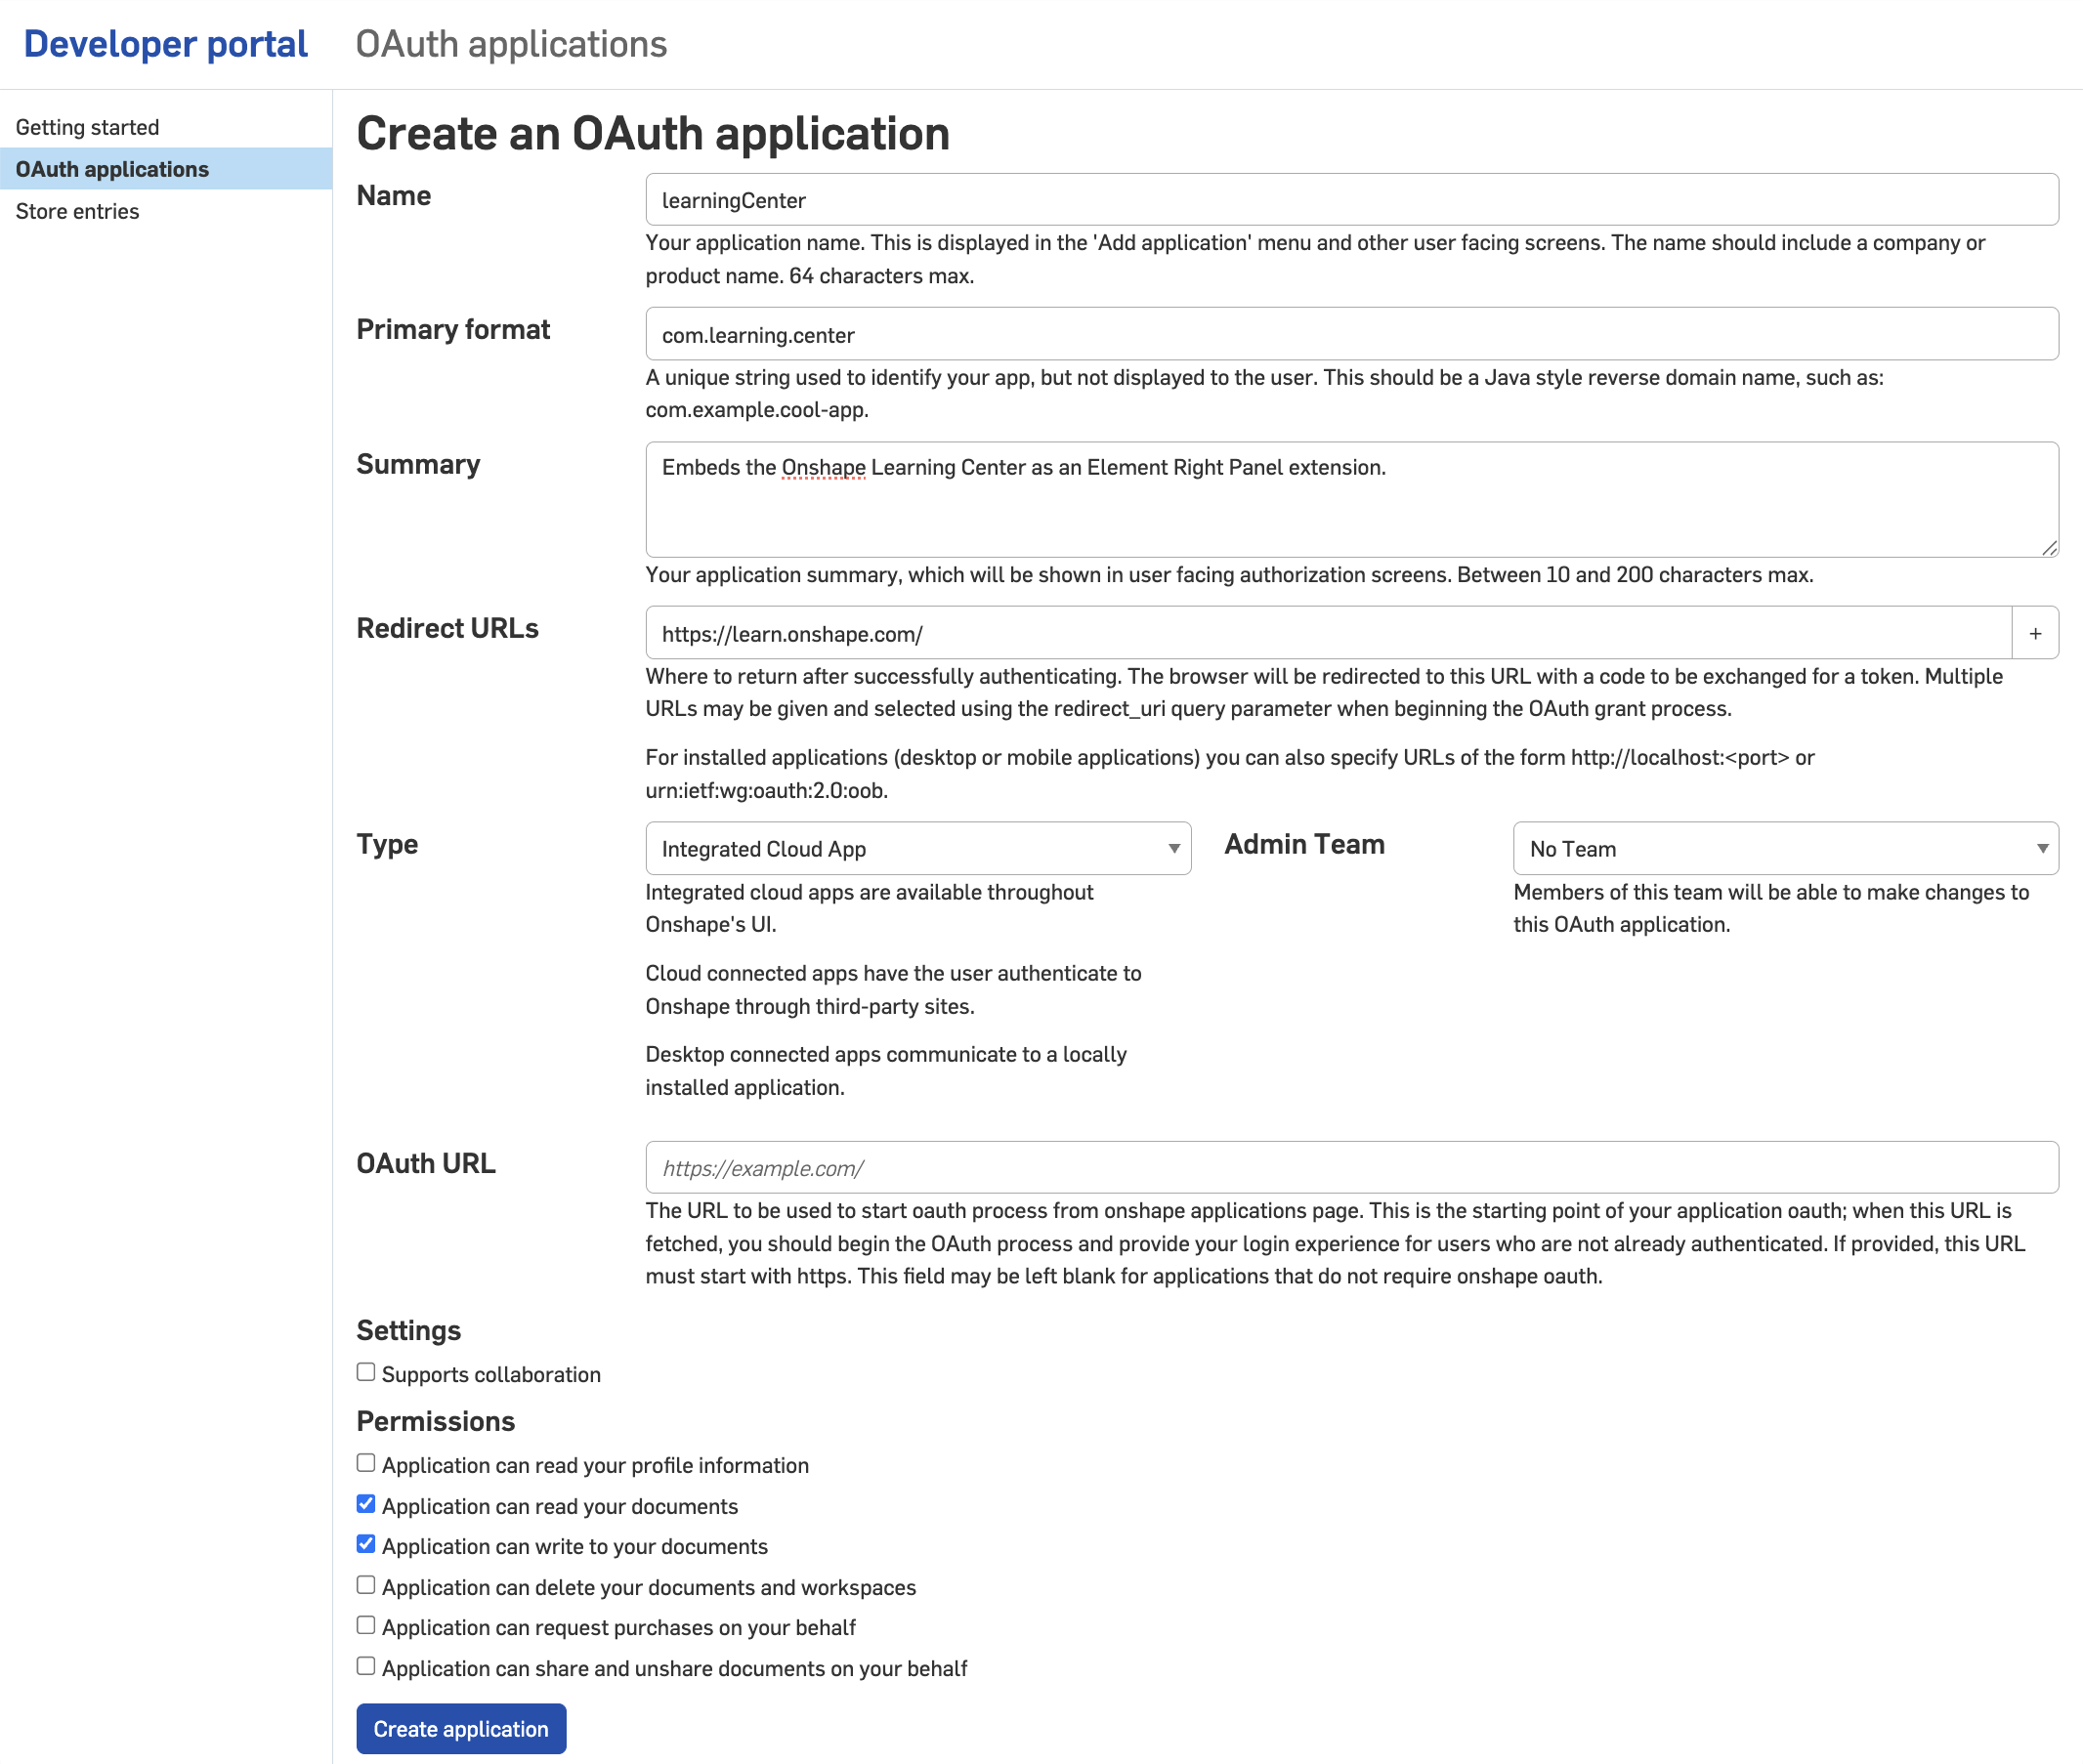
- Name: Application name
- Primary format: com.example.example
- Summary: Brief summary of the app
- Redirect URLs: URL of the app landing page
- Permissions: Select the applicable permissions
- OAuth URL: URL for the OAuth login. See OAuth2 for details.
- Click Create application.
- A window opens with your OAuth key and secret. You cannot find this secret again, so store it securely, then close the dialog.
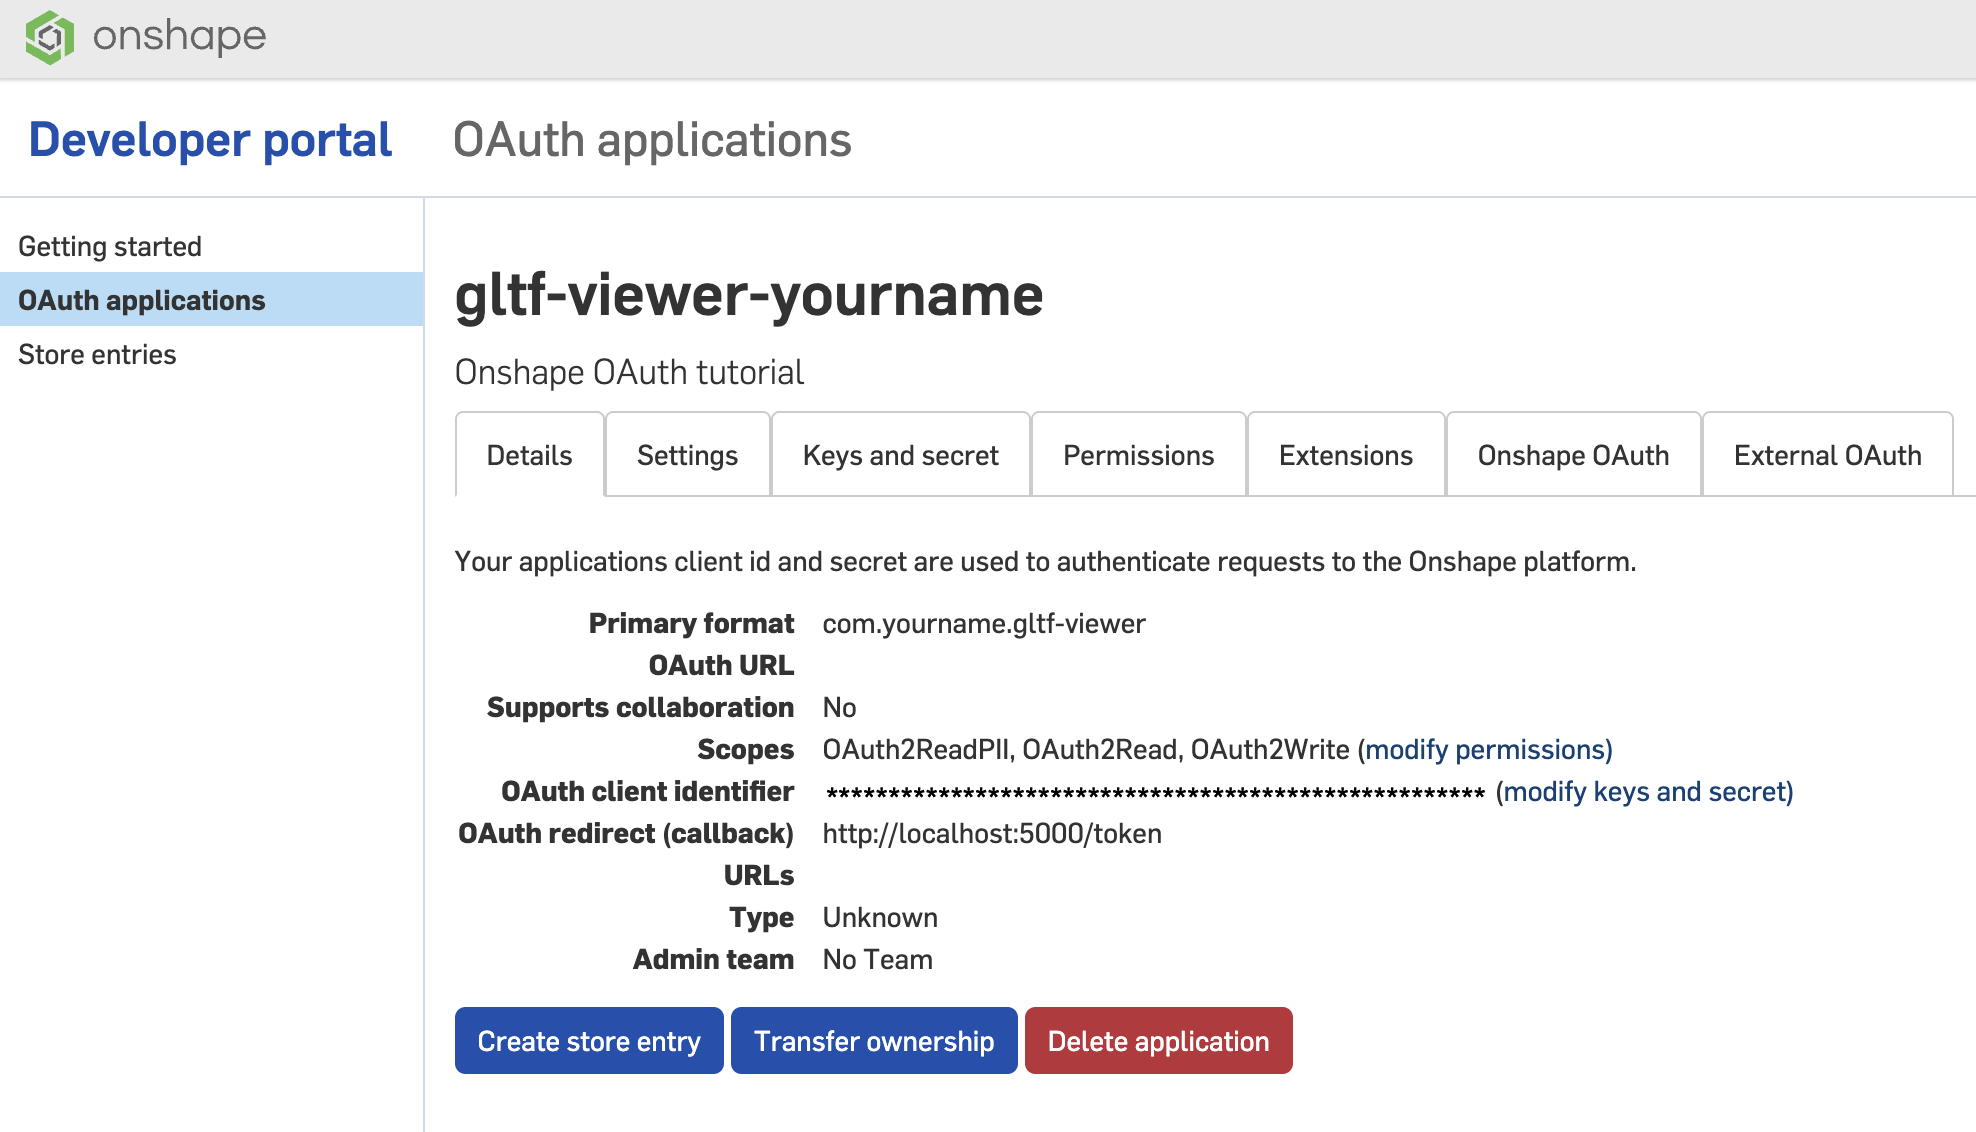
The application appears with the Details tab active:
Next, create an extension for the application.
Transfer app ownership
To transfer the app to a new owner:
- Go to https://cad.onshape.com/appstore/dev-portal and sign in.
- In the left sidebar, click OAuth applications.
- Click the application to transfer.
- Click the Transfer ownership button on the Details tab.
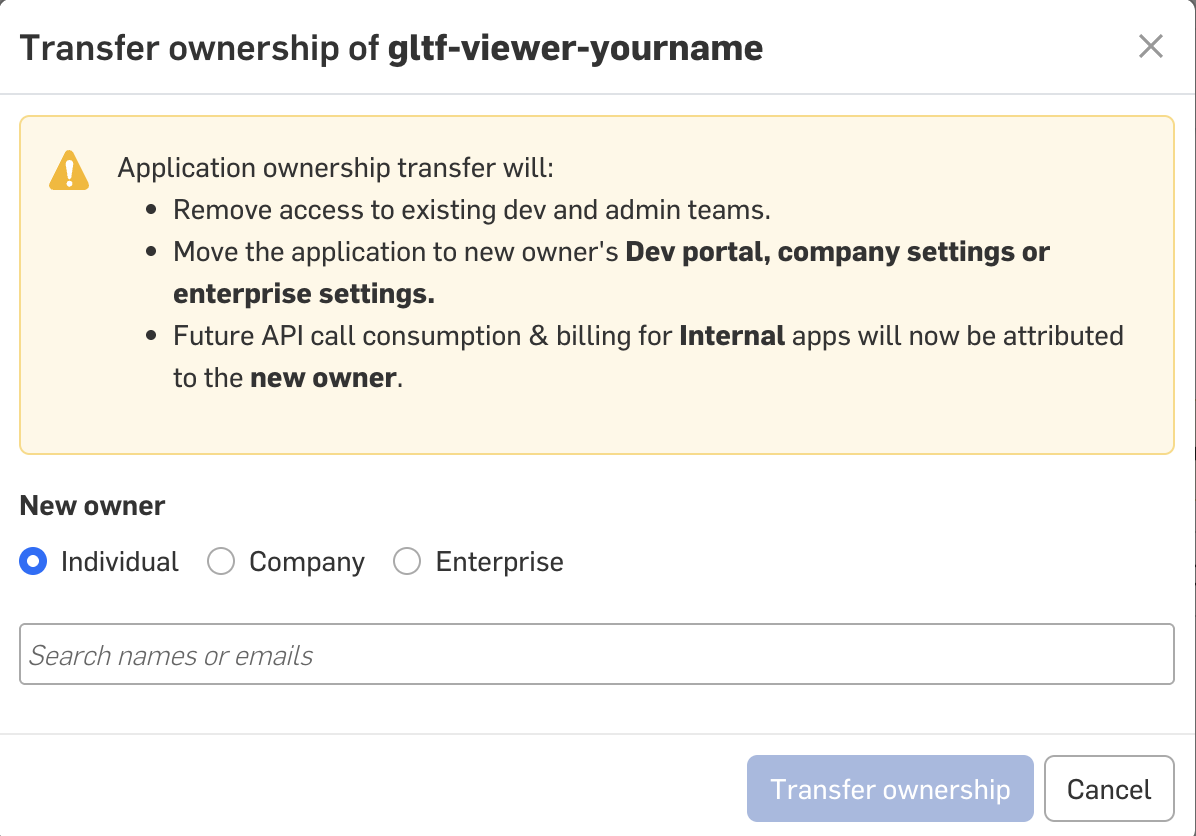
- Select an option to transfer the app to an individual, company, or enterprise.
- To transfer to an individual, enter the name or email of the new owner in the search field. To transfer ownership to a company or enterprise, select an option from the dropdown.
- Click Transfer Ownership. The application is removed from your dev portal.
- If the app was transferred to an individual, it appears in their dev portal.
- If the app was transferred to a company or enterprise, it appears in their Onshape Developer Settings.
Future API call consumption and billing will be attributed to the new owner. See API Limits for details.
Integration considerations
Onshape differs from many traditional CAD and PDM systems, and thus requires unique considerations. Key integration best practices include:
- Do not limit the capabilities of the software: When applying integration practices of legacy file-based solutions to Onshape, you must adjust the way designers work in Onshape to accommodate the limitations of your integration. The integration should follow best practices and methodologies that can be applied to modern SaaS-based solutions.
- Enable designers the freedom to work without constraints: Designers working in a CAD system should never be restricted in their ability to use the software features to the fullest. The software is designed to provide its users with the freedom to innovate and the flexibility to adjust to how a designer wants to work.
- Utilize the best in class features from each solution: Different software solutions provide different functionality. For instance, a CAD system should have best-in-class tools for modeling, whereas data management tools should provide capabilities to manage, analyze and report on data. While there might be overlap between systems, it is best practice to let each software solution do exactly what it was designed to do, instead of forcing one to perform the functions of the other.
- Map out your business processes: Decide which software solution is responsible for each part of the process. It is impossible to develop a successful integration if the requirements are not clear. The business processes managed through the integration should be mapped out, along with the systems involved and which system is responsible for which function.
- Use standards and published APIs: Developers hate when thousands of lines of code and days of work are thrown away because of a software upgrade. Using industry standards and published APIs protects your code from this disaster.
Resources
- Find Onshape documentation at: https://cad.onshape.com/help/Content/
- Find developer documentation on this site. We specifically recommend reviewing the following sections:
- Speak to other developers in the forum: https://forum.onshape.com/categories/developer-community/