Example: Hello World
In this example, we create an application extension in the element right panel to display a button to the user. When the button is clicked, a “Hello World!” message is displayed in the Onshape window.

This is a simple, unauthenticated example to get you started, and is not for production use.
Before you begin
Copy and execute the sample code
Copy the two files below and save them to your machine as
script.jsandindex.html.script.jsparses the Onshape URL, initializes the app with theapplicationInitmessage, and sends ashowMessageBubblemessage on button click.index.htmlspins up a simple HTML webpage with a button to display in the element right panel.
In your terminal, navigate to the folder in which you saved the files, and run:
python3 -m http.serverWindows users may need to run
python -m http.serverThis spins up a local server on which to host your application. Make a note of the port, which is typically
8000.To verify the sample code is being served by the http.server, open
http://localhost:8000(or the port returned in the last step). You should see a webpage with aClick Mebutton, though it will not work outside an Onshape document.
script.js
/**
 * Extracts Onshape document, workspace, and element IDs from a given URL.
 * Supports both query parameter format and Onshape path-based URL format.
 *
 * @param {string} currentURL - The full URL string to parse.
 * @returns {{ documentId: string, workspaceId: string, elementId: string }} An object containing the three Onshape IDs.
 * @throws {Error} If the required IDs cannot be found in the URL.
 */
function getOnshapeIdsFromUrl(currentURL) {
    const url = new URL(currentURL);
    const params = url.searchParams;

    const documentId = params.get('documentId');
    const workspaceId = params.get('workspaceId');
    const elementId = params.get('elementId');

    if (documentId && workspaceId && elementId) {
        return { documentId, workspaceId, elementId };
    }

    const pathMatch = url.pathname.match(/\/documents\/([^/]+)\/(?:w|v|m)\/([^/]+)\/e\/([^/]+)/);

    if (pathMatch) {
        return {
            documentId: pathMatch[1],
            workspaceId: pathMatch[2],
            elementId: pathMatch[3]
        };
    }

    throw new Error('Missing Onshape IDs in URL. Provide documentId, workspaceId, and elementId as query parameters or use an Onshape document URL.');
}

/**
 * Initializes the Hello World application once the DOM is fully loaded.
 *
 * This handler performs the following steps:
 * 1. Parses Onshape document, workspace, and element IDs from the current
 *    page URL using {@link getOnshapeIdsFromUrl}.
 * 2. Sends an `applicationInit` message to the Onshape parent frame
 *    to signal that the app is ready.
 * 3. Attaches a click listener to the button that sends a `showMessageBubble`
 *    message with the text "Hello World!" to the parent frame.
 *
 * @listens Document#DOMContentLoaded
 */
document.addEventListener('DOMContentLoaded', function() {

    // Get reference to the button.
    const showMessageBubble = document.getElementById('showMessageBubble');

    // Get reference to the parsed IDs.
    const { documentId, workspaceId, elementId } = getOnshapeIdsFromUrl(window.location.href);
    console.log('Onshape IDs:', { documentId, workspaceId, elementId });

    // Send applicationInit message
    const appInitMessage = {
        documentId: documentId,
        workspaceId: workspaceId,
        elementId: elementId,
        messageName: 'applicationInit'
    };
    window.parent.postMessage(appInitMessage, '*');

    // On button click, send showMessageBubble message and display 'Hello World!' to user.
    showMessageBubble.addEventListener('click', function() {
        const message = {documentId: documentId,
                     workspaceId: workspaceId,
                     elementId: elementId,
                     messageName: 'showMessageBubble',
                     message: 'Hello World!'};
        window.parent.postMessage(message, '*');
    });
});
index.html
<!DOCTYPE html>
<html lang="en">
<body>
    <main>
        <p>Click the button below to send the `showMessageBubble` message to Onshape, which displays "Hello World!" in a blue bubble.</p>
        <button id="showMessageBubble">Click Me</button>
    </main>
    <script src="script.js"></script>
</body>
</html>
Register the application
- Navigate to the correct page:
- Company/Classroom/Enterprise accounts: Company/Classroom/Enterprise Settings - Developer
- Individual accounts: My Account Settings - Developer
- Click the OAuth applications tab.
- Click the Create new OAuth application button.
- Fill out the form:
- Name:
Hello World - Primary format:
com.hello.world - Summary:
A "Hello World" element right panel extension. - Redirect URLs:
http://localhost:8000/ - Permissions: Select
Application can read your documentsandApplication can write to your documents. - OAuth URL: Skip authentication for this example. This app cannot be shared. See OAuth2 for details.
- Name:
- Click Create application.
- We do not need the OAuth secret for this example; close the dialog that appears. Your application is now visible.
Create the extension
- Click the Extensions tab.
- Click Add extension.
- Fill out the dialog:
- Name:
Hello World - Location:
Element right panel - Context:
Inside part studio - Action URL:
http://localhost:8000?documentId={$documentId}&workspaceId={$workspaceOrVersionId}&elementId={$elementId} - Icon: Select an image.
- Name:
- Click OK.
Create the app store entry
Company, Classroom, and Enterprise admins can assign internal users, aliases, and teams to apps in their Developer Settings without having to create a store entry.
- Click OAuth applications to see your list of registered apps.
- Select your app and click the Details tab if it’s not already active.
- Click Create store entry.
- Fill out the form:
- Category:
Content - Description:
A "Hello World" element right panel extension. - Vendor Name:
Your Name
- Category:
- Click Create.
Subscribe to the app
Company, Classroom, and Enterprise admins can assign internal users, aliases, and teams to apps in their Developer Settings without having to create a store entry.
- Go to the Onshape App Store: https://cad.onshape.com/appstore?sort=date
- Select the private app. No one else can view or subscribe to your private apps.
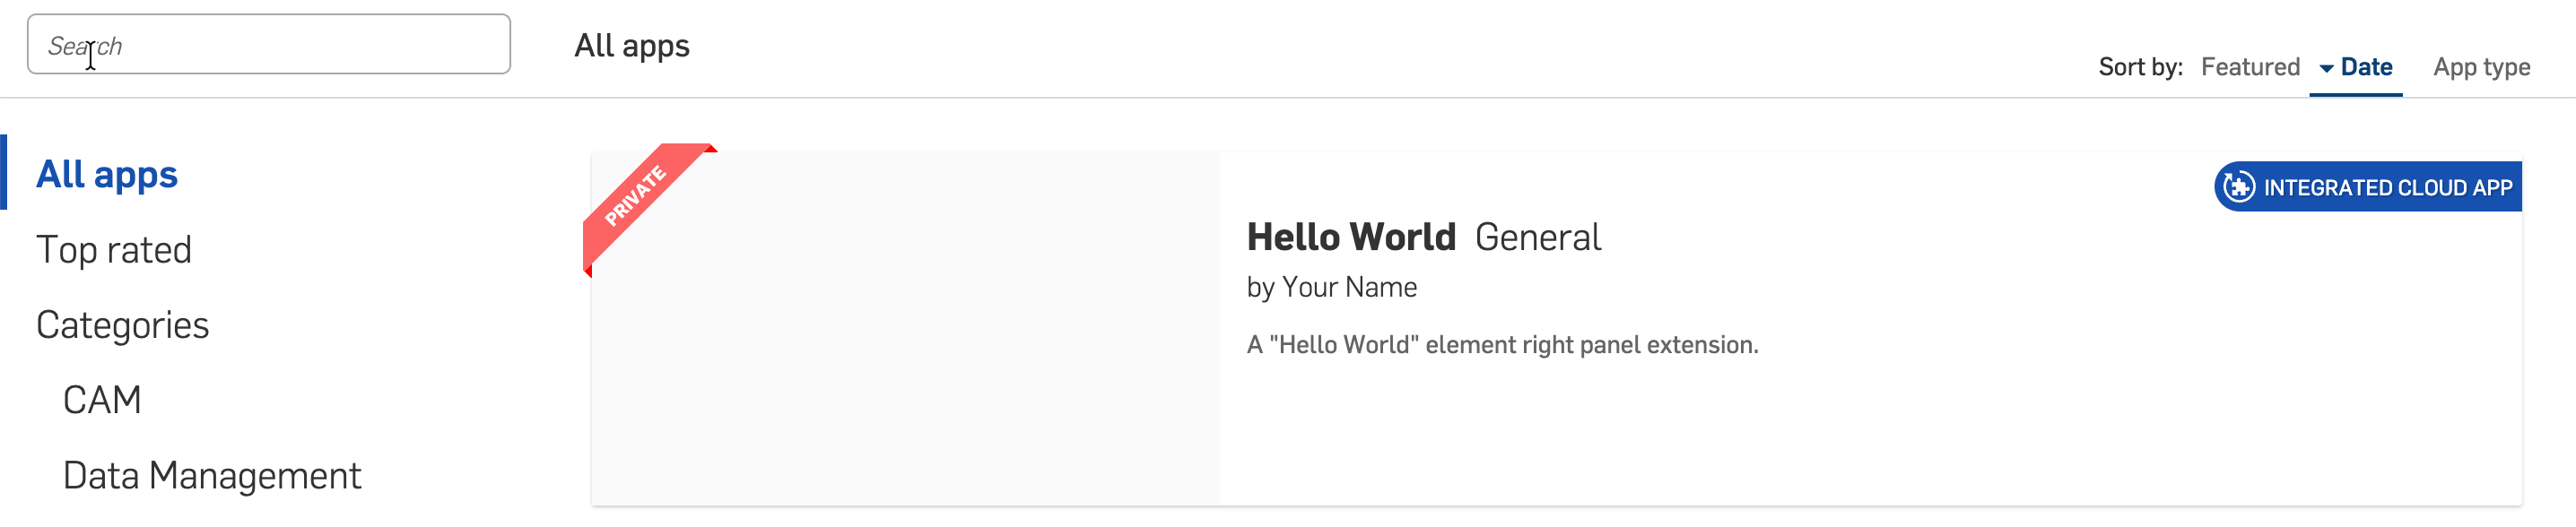
- Click the Subscribe button.
- Click Get for free.
- Click Close.
Use the app
- Open any Part Studio in Onshape. You may have to reload the page.
- Click the
Hello Worldright panel icon. The element right panel extension opens. - Click the
Click Mebutton in the panel. TheHello World!blue message bubble appears in the Onshape window.